

Ch. 3: Deploy Your First Smart Contract (ERC-20 Token)
Deploy an ERC-20 token with thirdweb's pre-built contract via script or dashboard


Introduction
A token is a digital asset that resides on the blockchain. There are two major categories of tokens: fungible and non-fungible. For now, understand that fungible tokens are interchangeable, whereas non-fungible tokens are unique.
Fungible tokens follow the ERC-20 standard and are commonly used for investment purposes.
Tokens can also:
- raise funds for crowd sales
- be used as a store of value
- be used to make purchases/transactions
- be used as loyalty points
- represent other cryptocurrencies
The possibilities are endless, and there are many creative ways we can use the ERC-20 fungible token as part of our web3 applications.
In this chapter, we will deploy a fungible token or ERC-20 contract and mint a bunch of tokens we will use in our application. We will create a currency for our Cookie Project called cookie dough.
Get it? Dough? Like cash. Sorry, the puns only get worse from here.
Deploy ERC-20 Tokens Using thirdweb's SDK
Wait before we get started- just one more thing. Make sure to have Node.js installed. If you don't have it installed, you can download the latest version on the Node.js website.
To deploy a Token smart contract using a script, let's start by creating a folder with two files in VS Code or your preferred text editor. The first will be an index.js file for your deploy script, and the second will be .env to store your private keys.
We will run the following command in our terminal to install all of our necessary libraries.
npm install @thirdweb-dev/sdk ethers dotenv
This line installs the thirdweb SDK, ethers (a library for interfacing with the blockchain), and the library for .env to create an environment variable to hold our private key.
We can start with our
.envfile! Remember when we learned how to export the private key at the end of the last chapter? This line is where we will paste it to reference in our script later.PRIVATE_KEY =<private key>Note: I highly recommend creating a temporary dummy wallet to test your code while you learn. Once you feel more comfortable with the interface and your abilities, feel free to start using another wallet with real funds.
Next, in our
index.jsfile, let's add all the necessary imports starting with thirdweb. The thirdweb SDK gives us the functions to deploy our smart contract. We also need dotenv, a library that will allow us to create an environmental variable file we will use to store our private key.import { ThirdwebSDK } from '@thirdweb-dev/sdk'; import dotenv from 'dotenv';Let's configure our dotenv file.
dotenv.config();Now, we will pass in our private key value from our
.envfile and the network into a method calledfromPrivateKey.This method allows us to get an instance of the thirdweb SDK based on our private key.For the network, I am using Mumbai but feel free to use a different one if you prefer (see the previous chapter for testnets and faucets). We will assign this to
SDKto reference later.const sdk = ThirdwebSDK.fromPrivateKey(process.env.PRIVATE_KEY, "mumbai",);Next, we will create an async function called
deployToken().We will first name our token inside the method withname:.Secondly, we will assign a wallet that will receive the funds from any transaction or a
primary_sale_recipient.Here we will paste the public address of the wallet.async function deployToken() { try { const tokenDropContract = await SDK.deployer.deployToken({ name: "Cookie Dough", primary_sale_recipient: "0xED70E8e00Db33c44Df71f100319aB6a5f57D9058", }); console.log("Token Drop Contract Deployed:", tokenDropContract); } catch (error) { console.error("failed to deploy contract:", error); } }Lastly, we want to call the function we just created.
deployToken();Now, in our terminal, we can run
node index.js,which will run our script. This process may take a few seconds, so be patient. Upon success, we should see "Token Drop Contract Deployed:" followed by a contract address.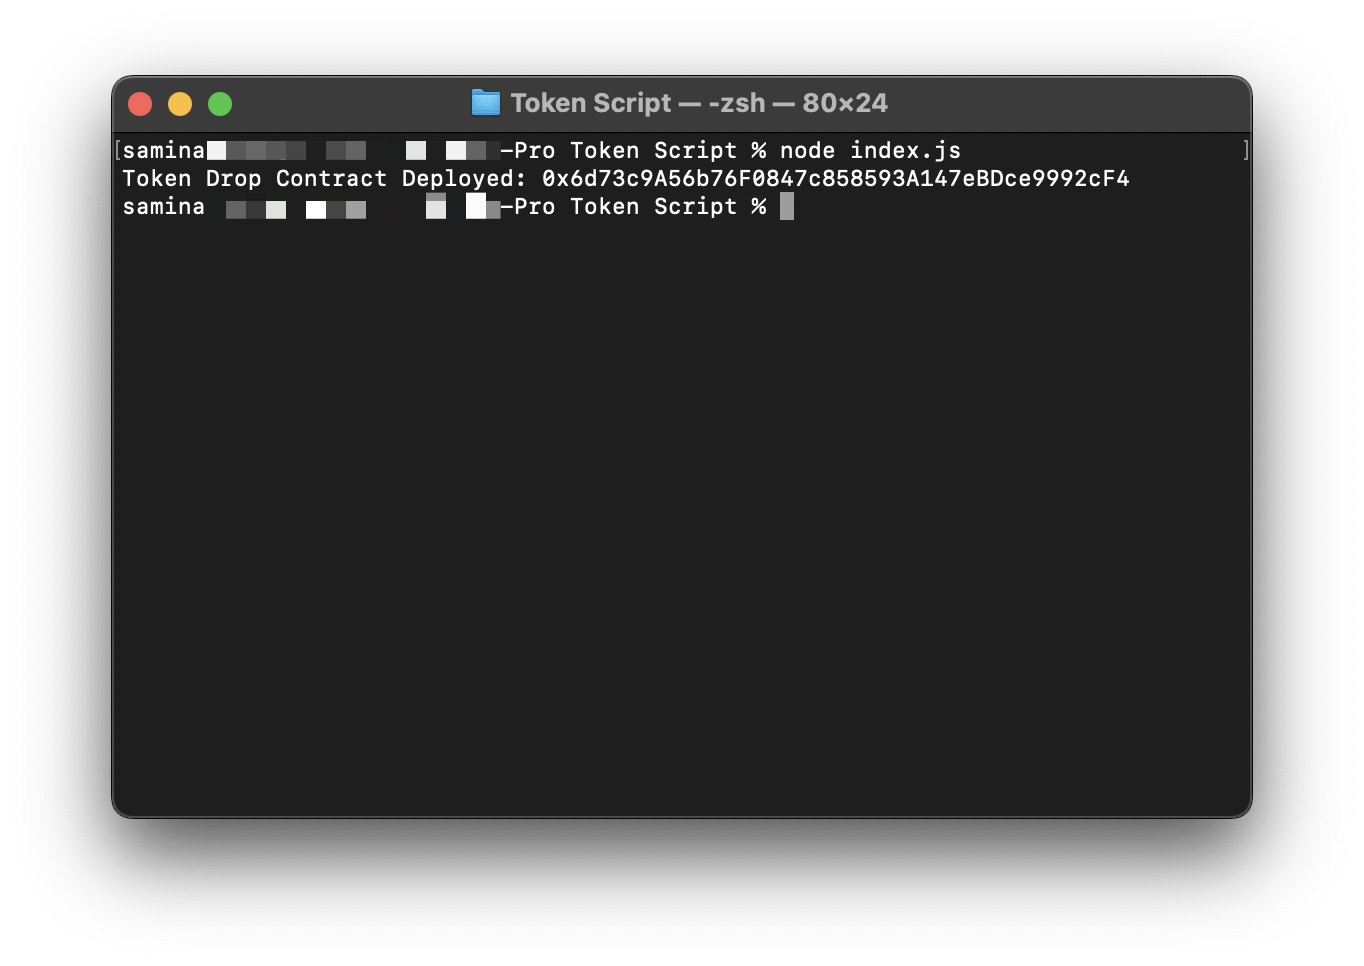
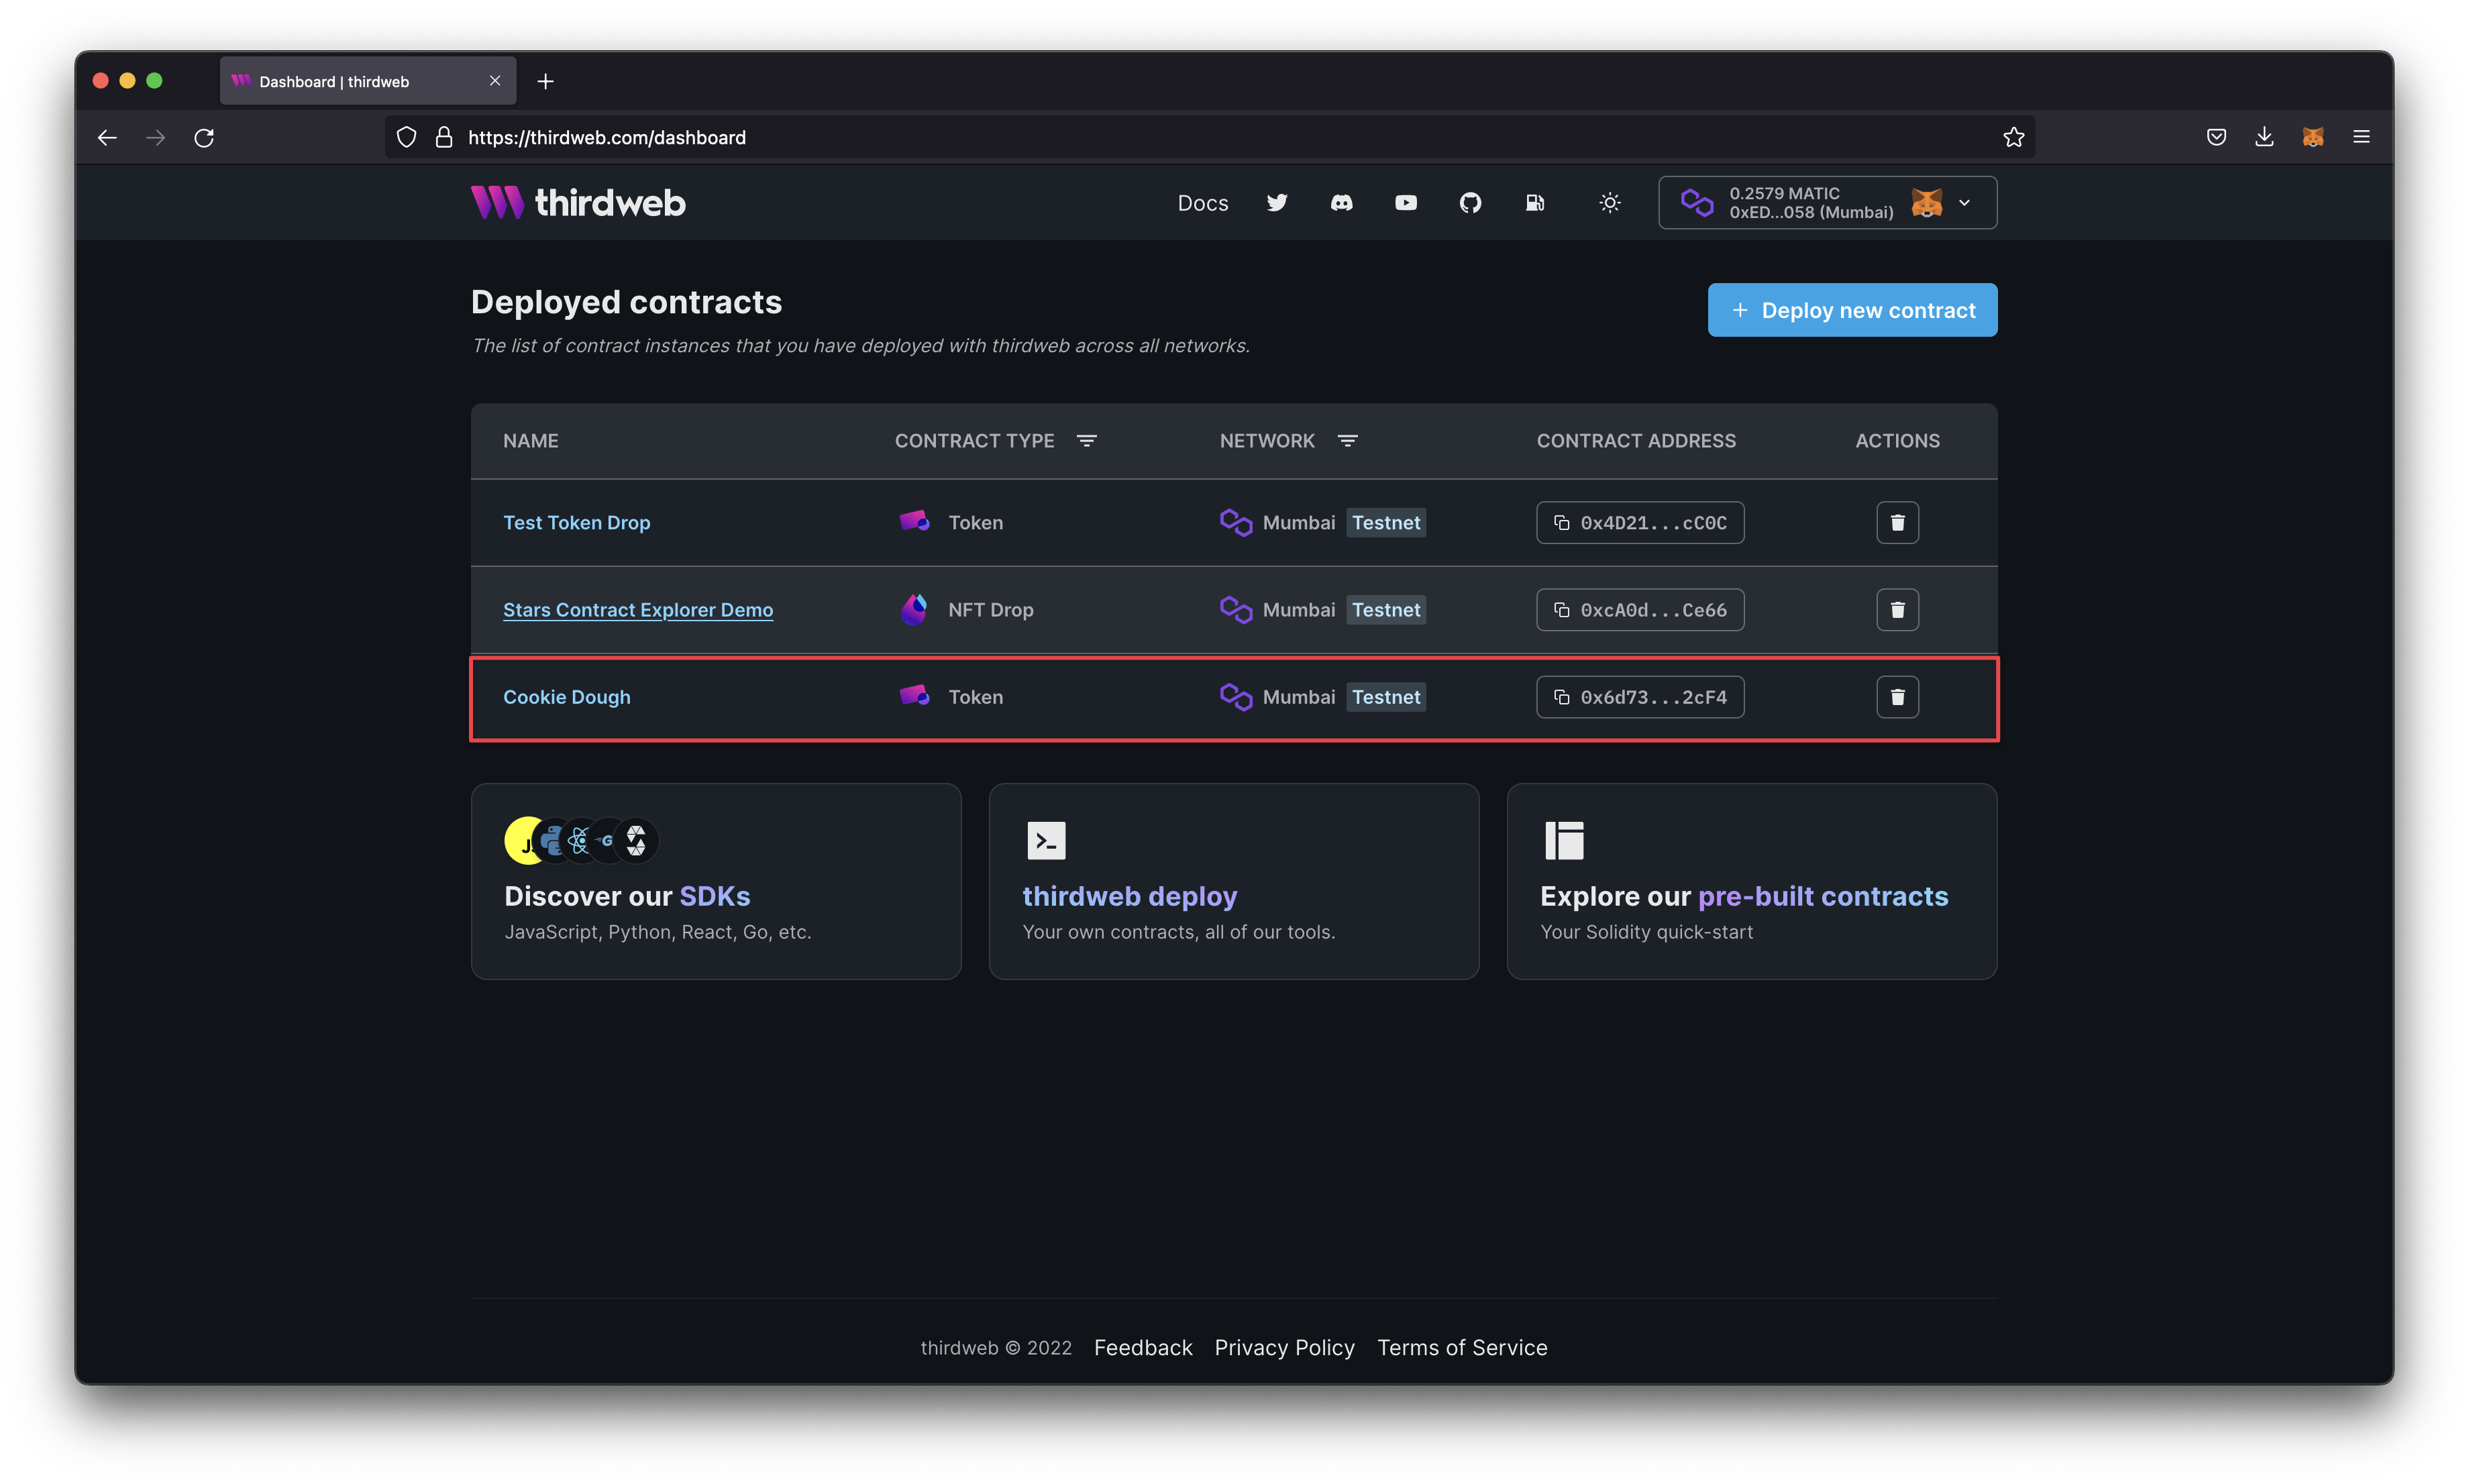
(Optional) Let's open up our contract on the thirdweb dashboard by navigating to thirdweb.com/dashboard and connecting our wallet. We can see the contract we deployed through the script on our dashboard.
If you'd like to see the complete code for the deploy script, you can see it in Chapter 3 of the Cookie Project Chapters repository on GitHub.
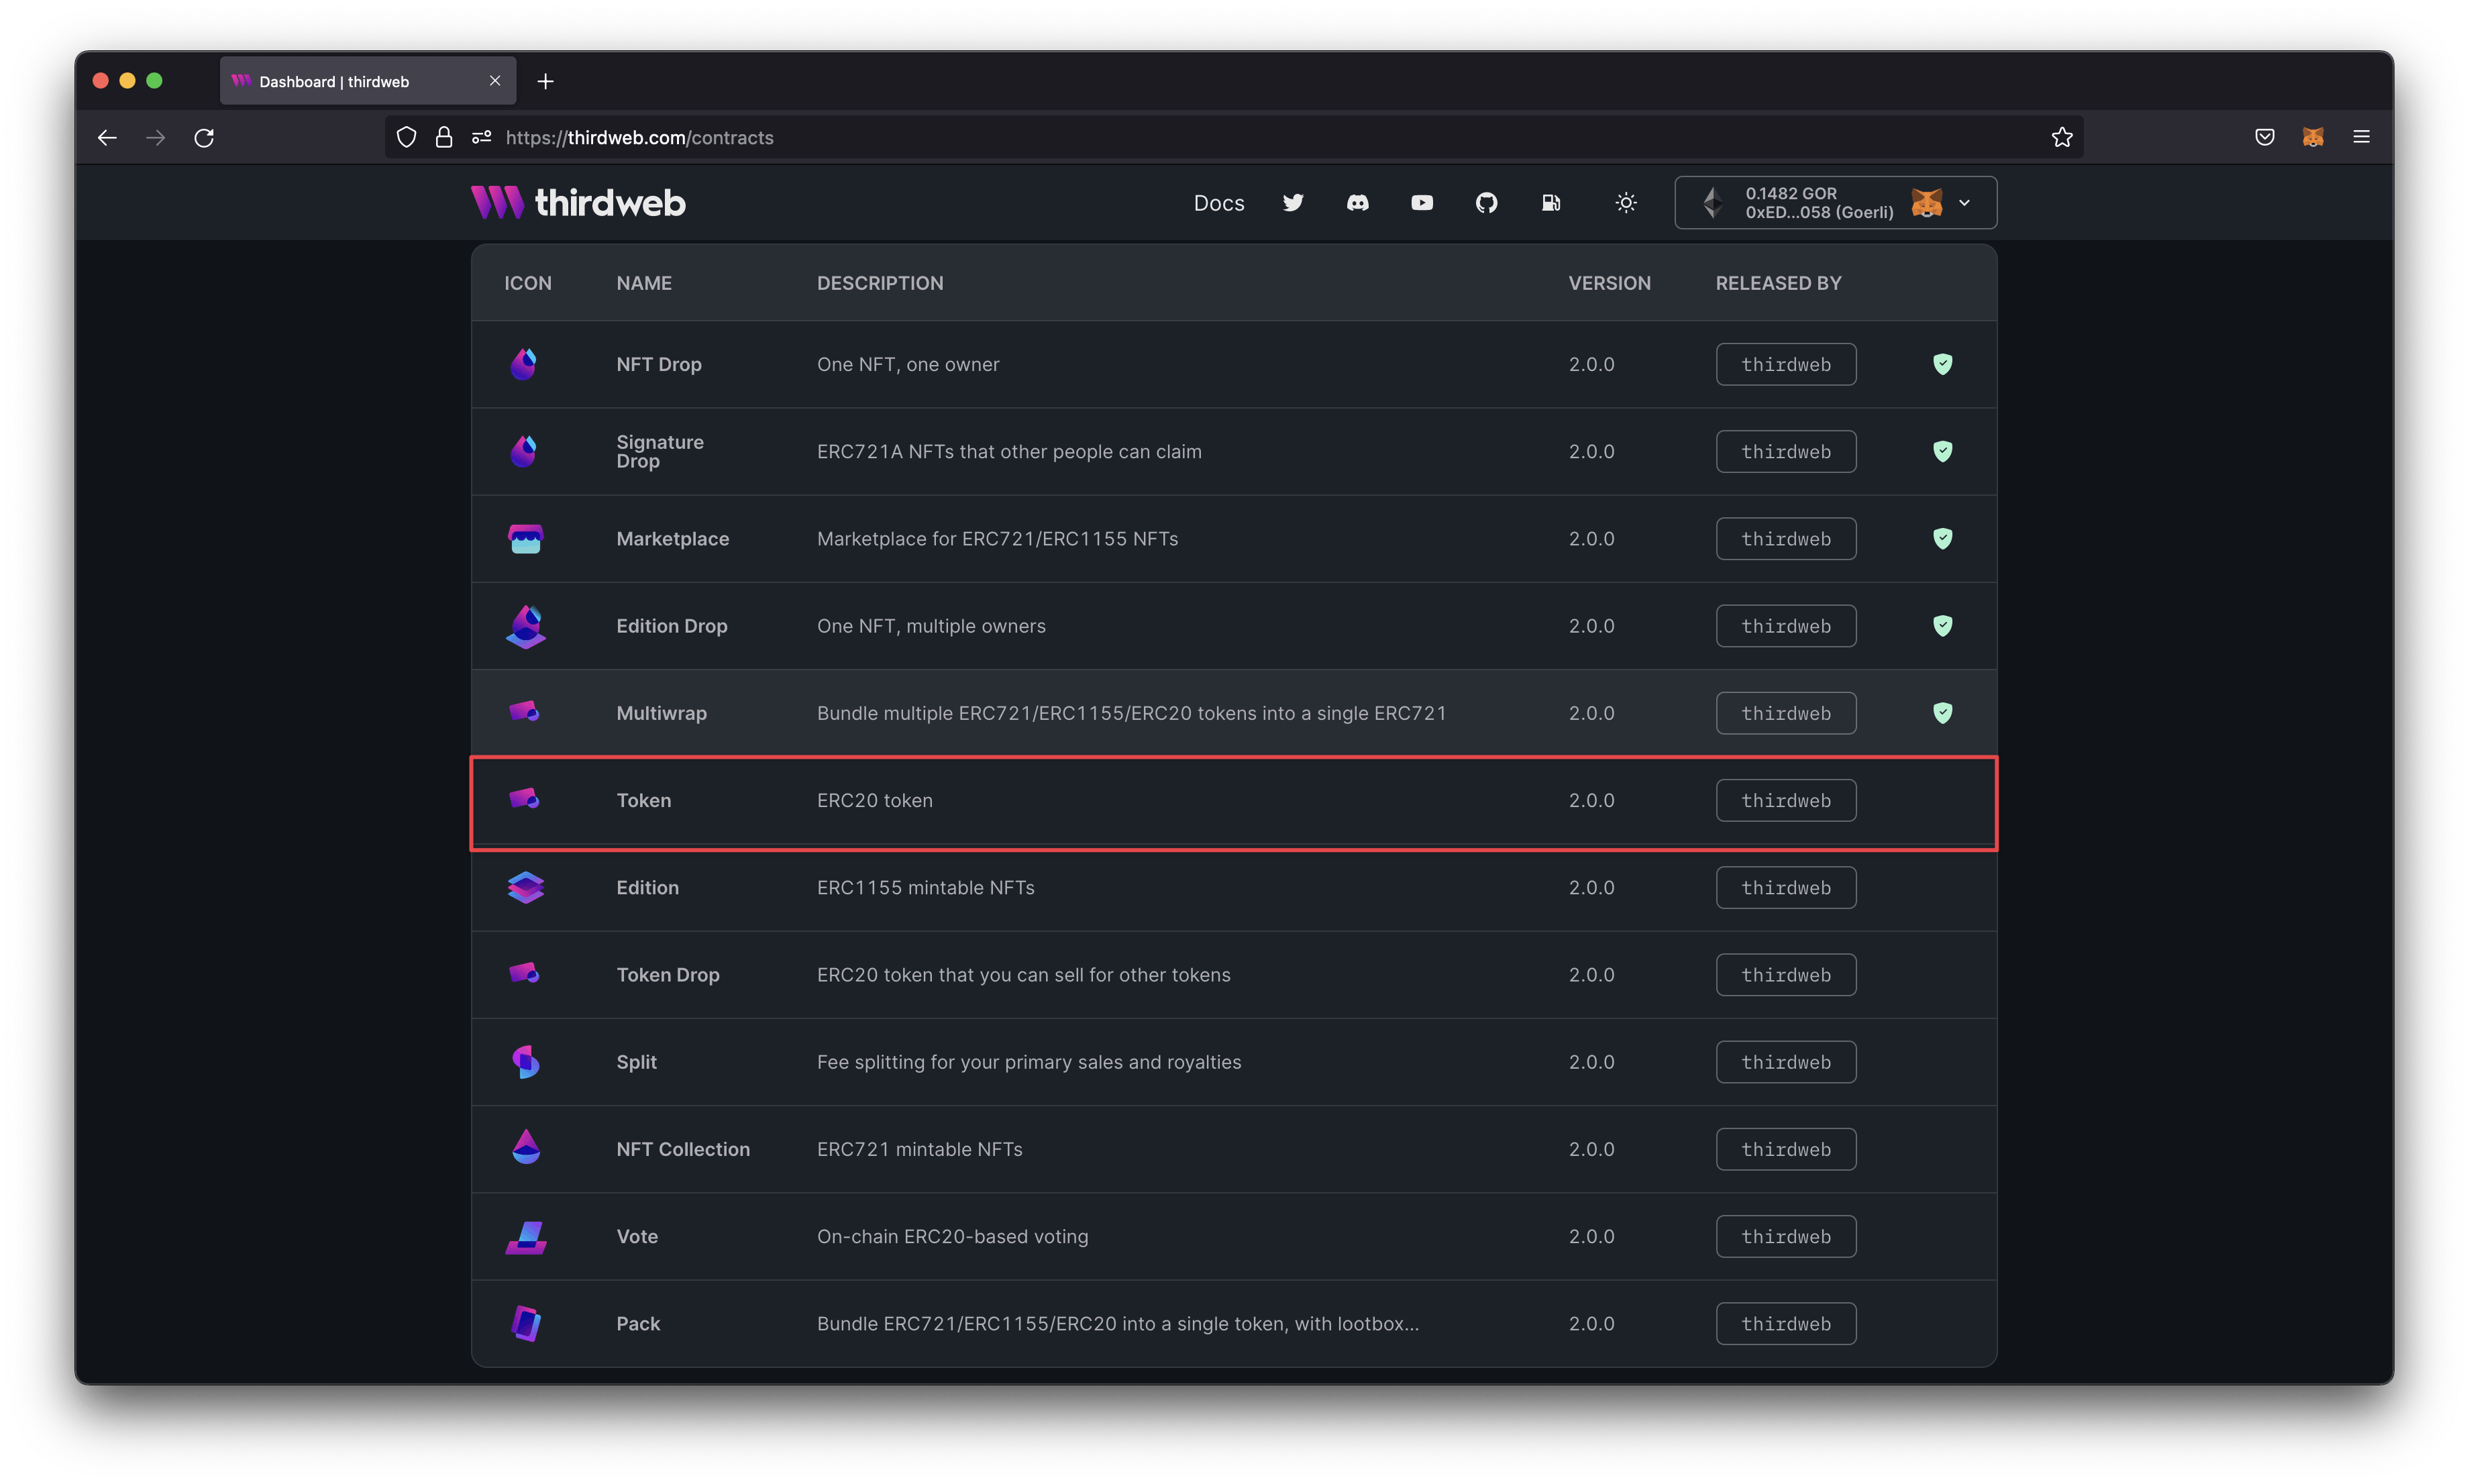
Deploy An ERC-20 Using thirdweb's dashboard
Now that we learned how to deploy a contract using a script, I will show you an even easier way to deploy an ERC-20 token contract without writing any code.
Thirdweb has a pre-built ERC-20 standard token contract that we can deploy directly through the dashboard. When deploying through the client instead of a server, it does not require us to put our private key in a .env file. This method reduces the risk of accidentally pushing our private key to GitHub or a server.
The thirdweb dashboard also allows us to manage permission and provides a built-in contract explorer, activity feed, and much more. We will explore all these features in the coming chapters.
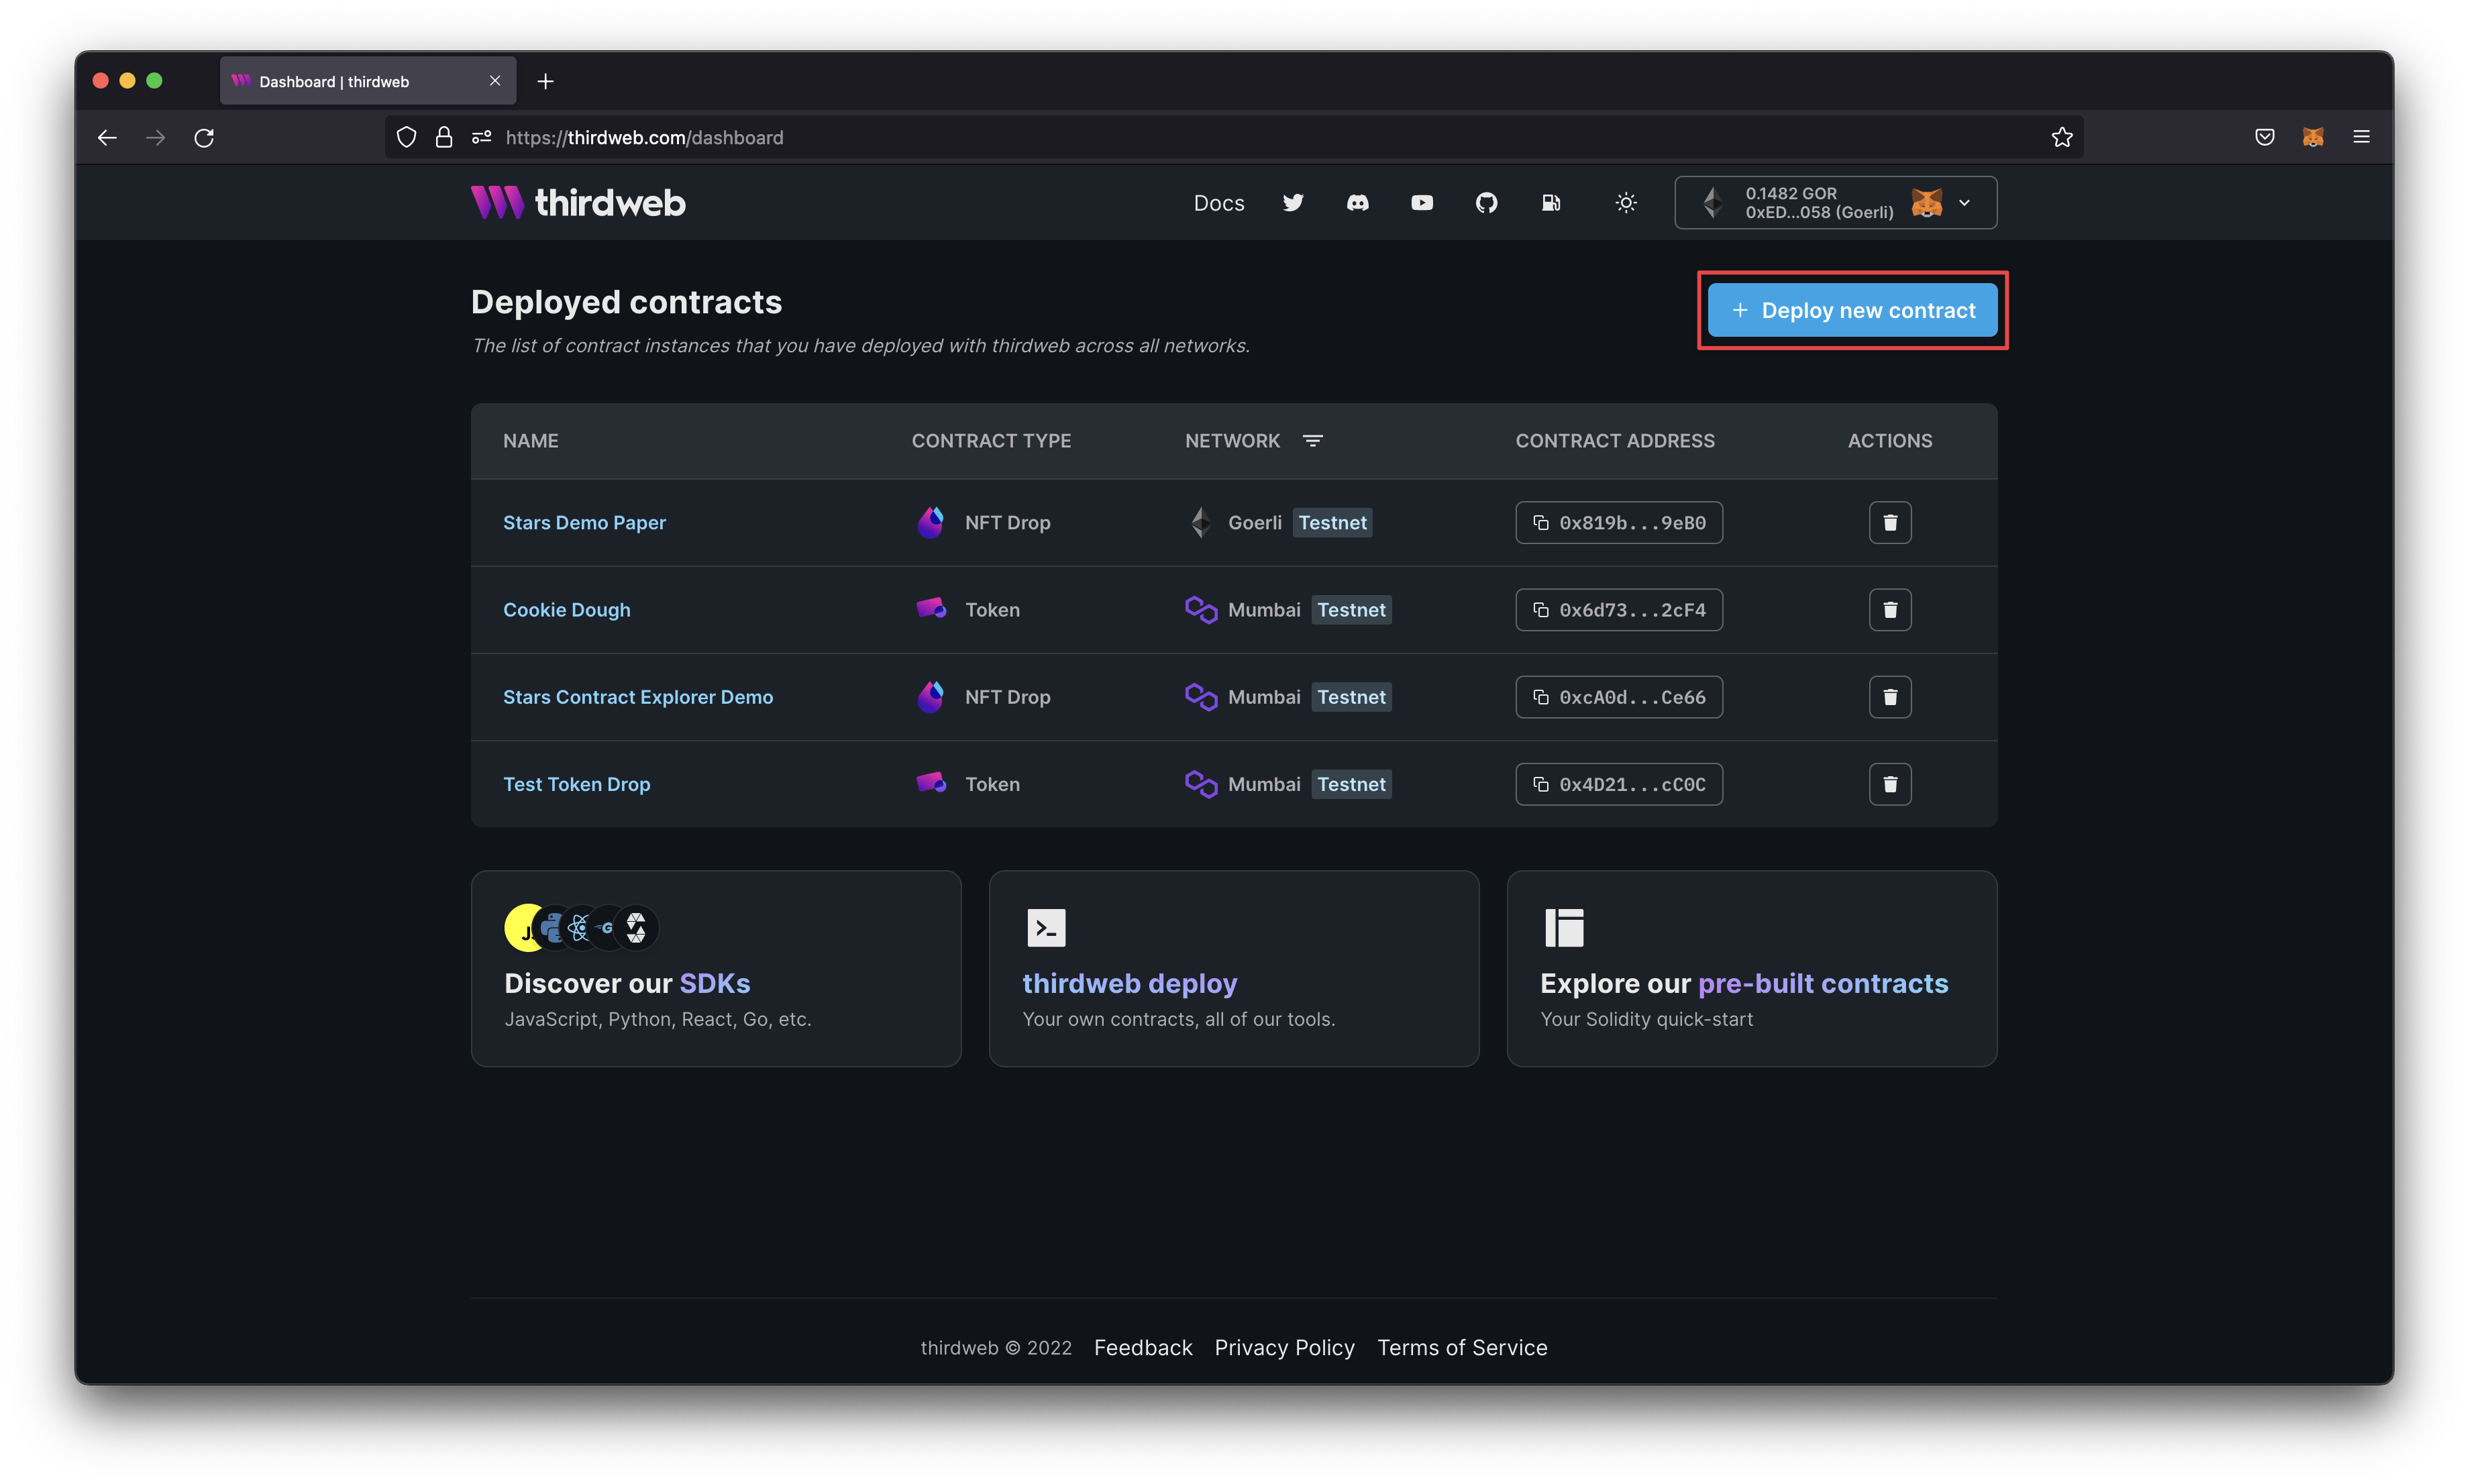
Navigate to the thirdweb dashboard and connect the wallet you want to deploy your contract.
Click the blue button that says 'Deploy new contract.'
Scroll down until you see the pre-built token contract and click it.
On the next screen, we have a few settings we need to configure and tweak to deploy our contract.
a. Image is an optional metadata field and can be used to display the icon or logo of your token.
b. Name is a required metadata field that is the name of your token. In this project, we will call our token 'Cookie Dough.'
c. Symbol is an optional metadata field similar to a stock ticker. This data will be the symbol listed on different coin exchanges or other sites.
d. Description is an optional metadata field that describes what your token is. You can input any text here.
e. Primary Recipient is the public wallet address that will receive any revenue from the token sale. It will default populate the connected wallet's address, but you can change it to any wallet.
f. Network / Chain is the network that you want to deploy it on. Thirdweb provides several options, but for this guide, I will stick to the Mumbai testnet.
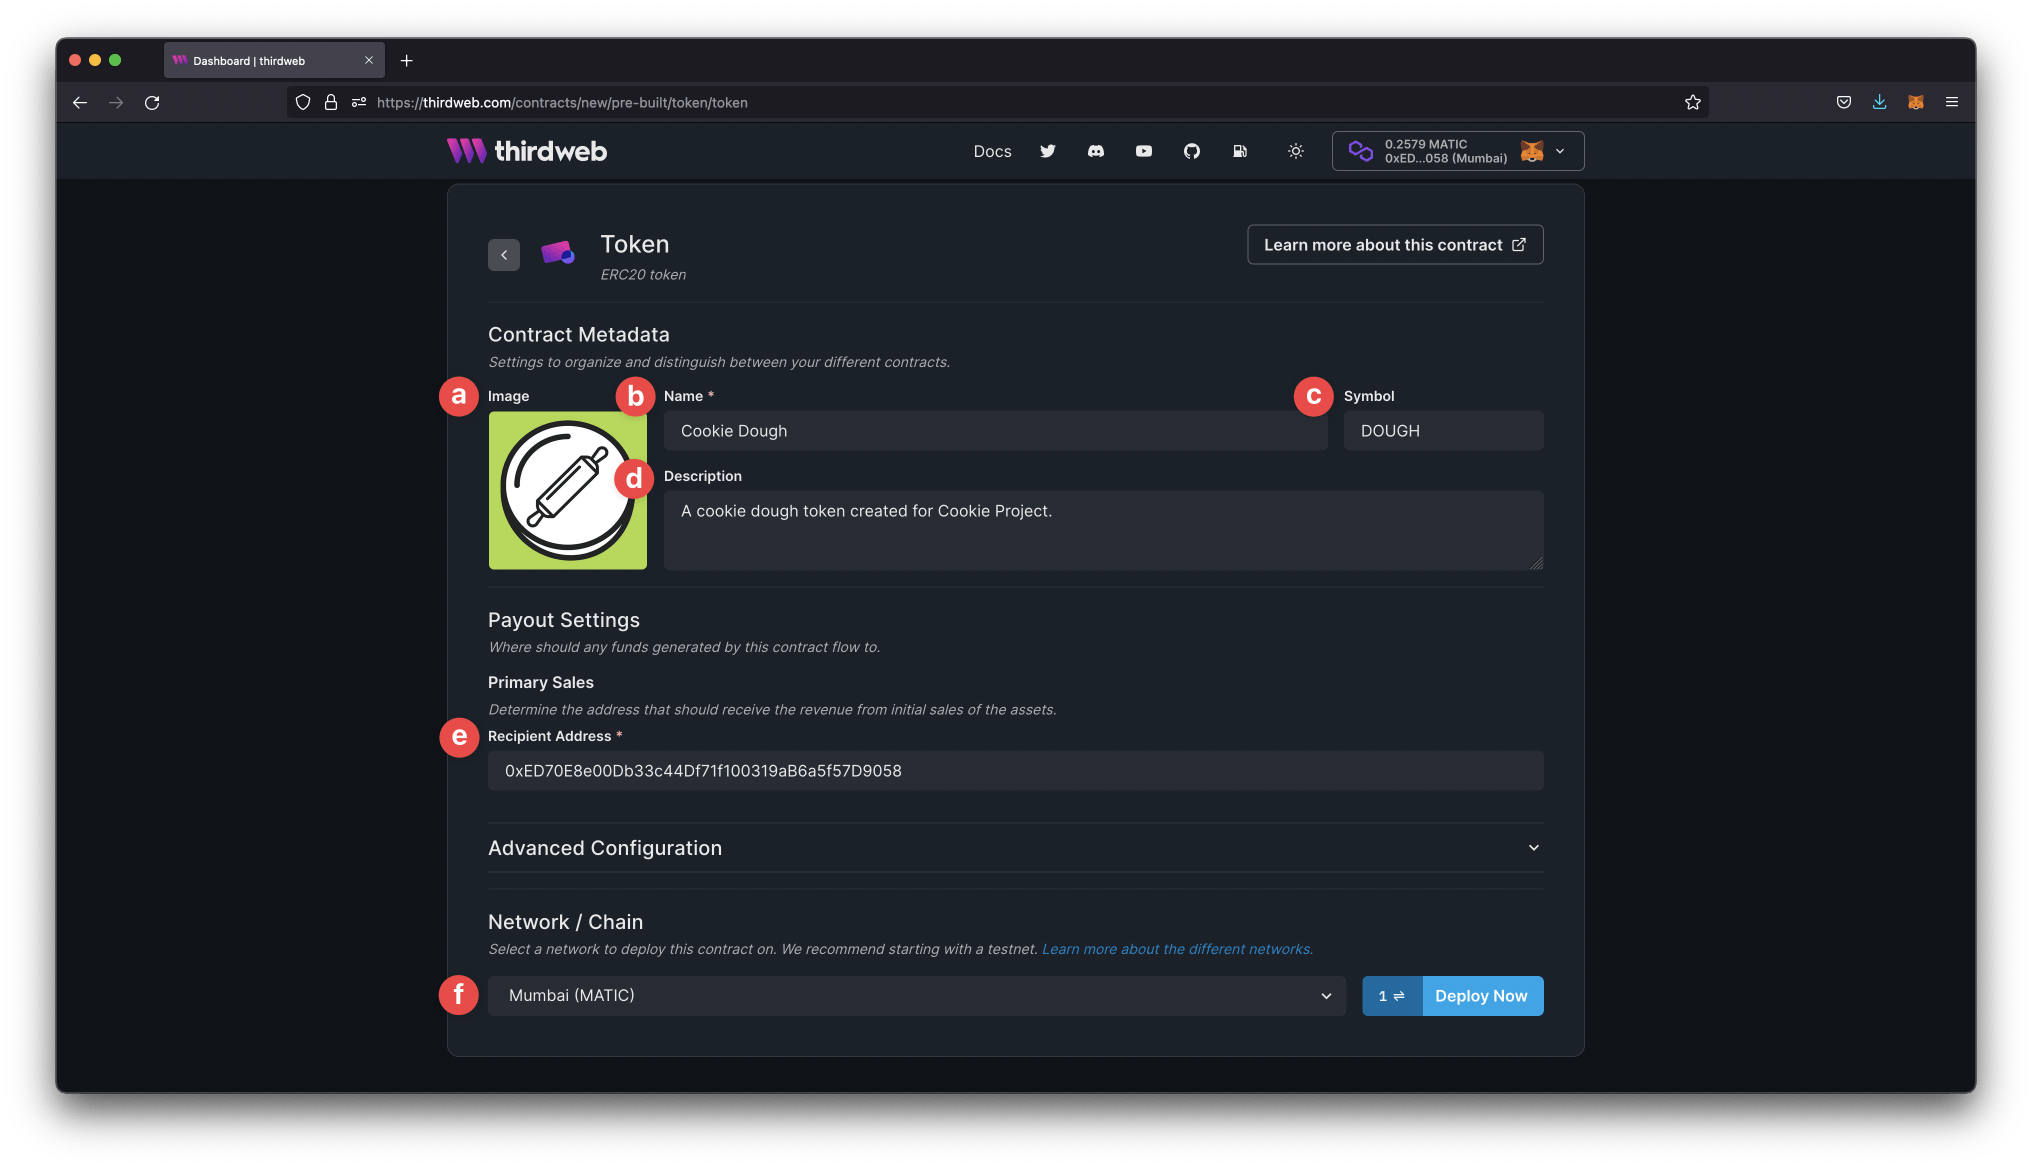
When you are content with all your settings, you can click on deploy now, which will prompt a transaction from your wallet.
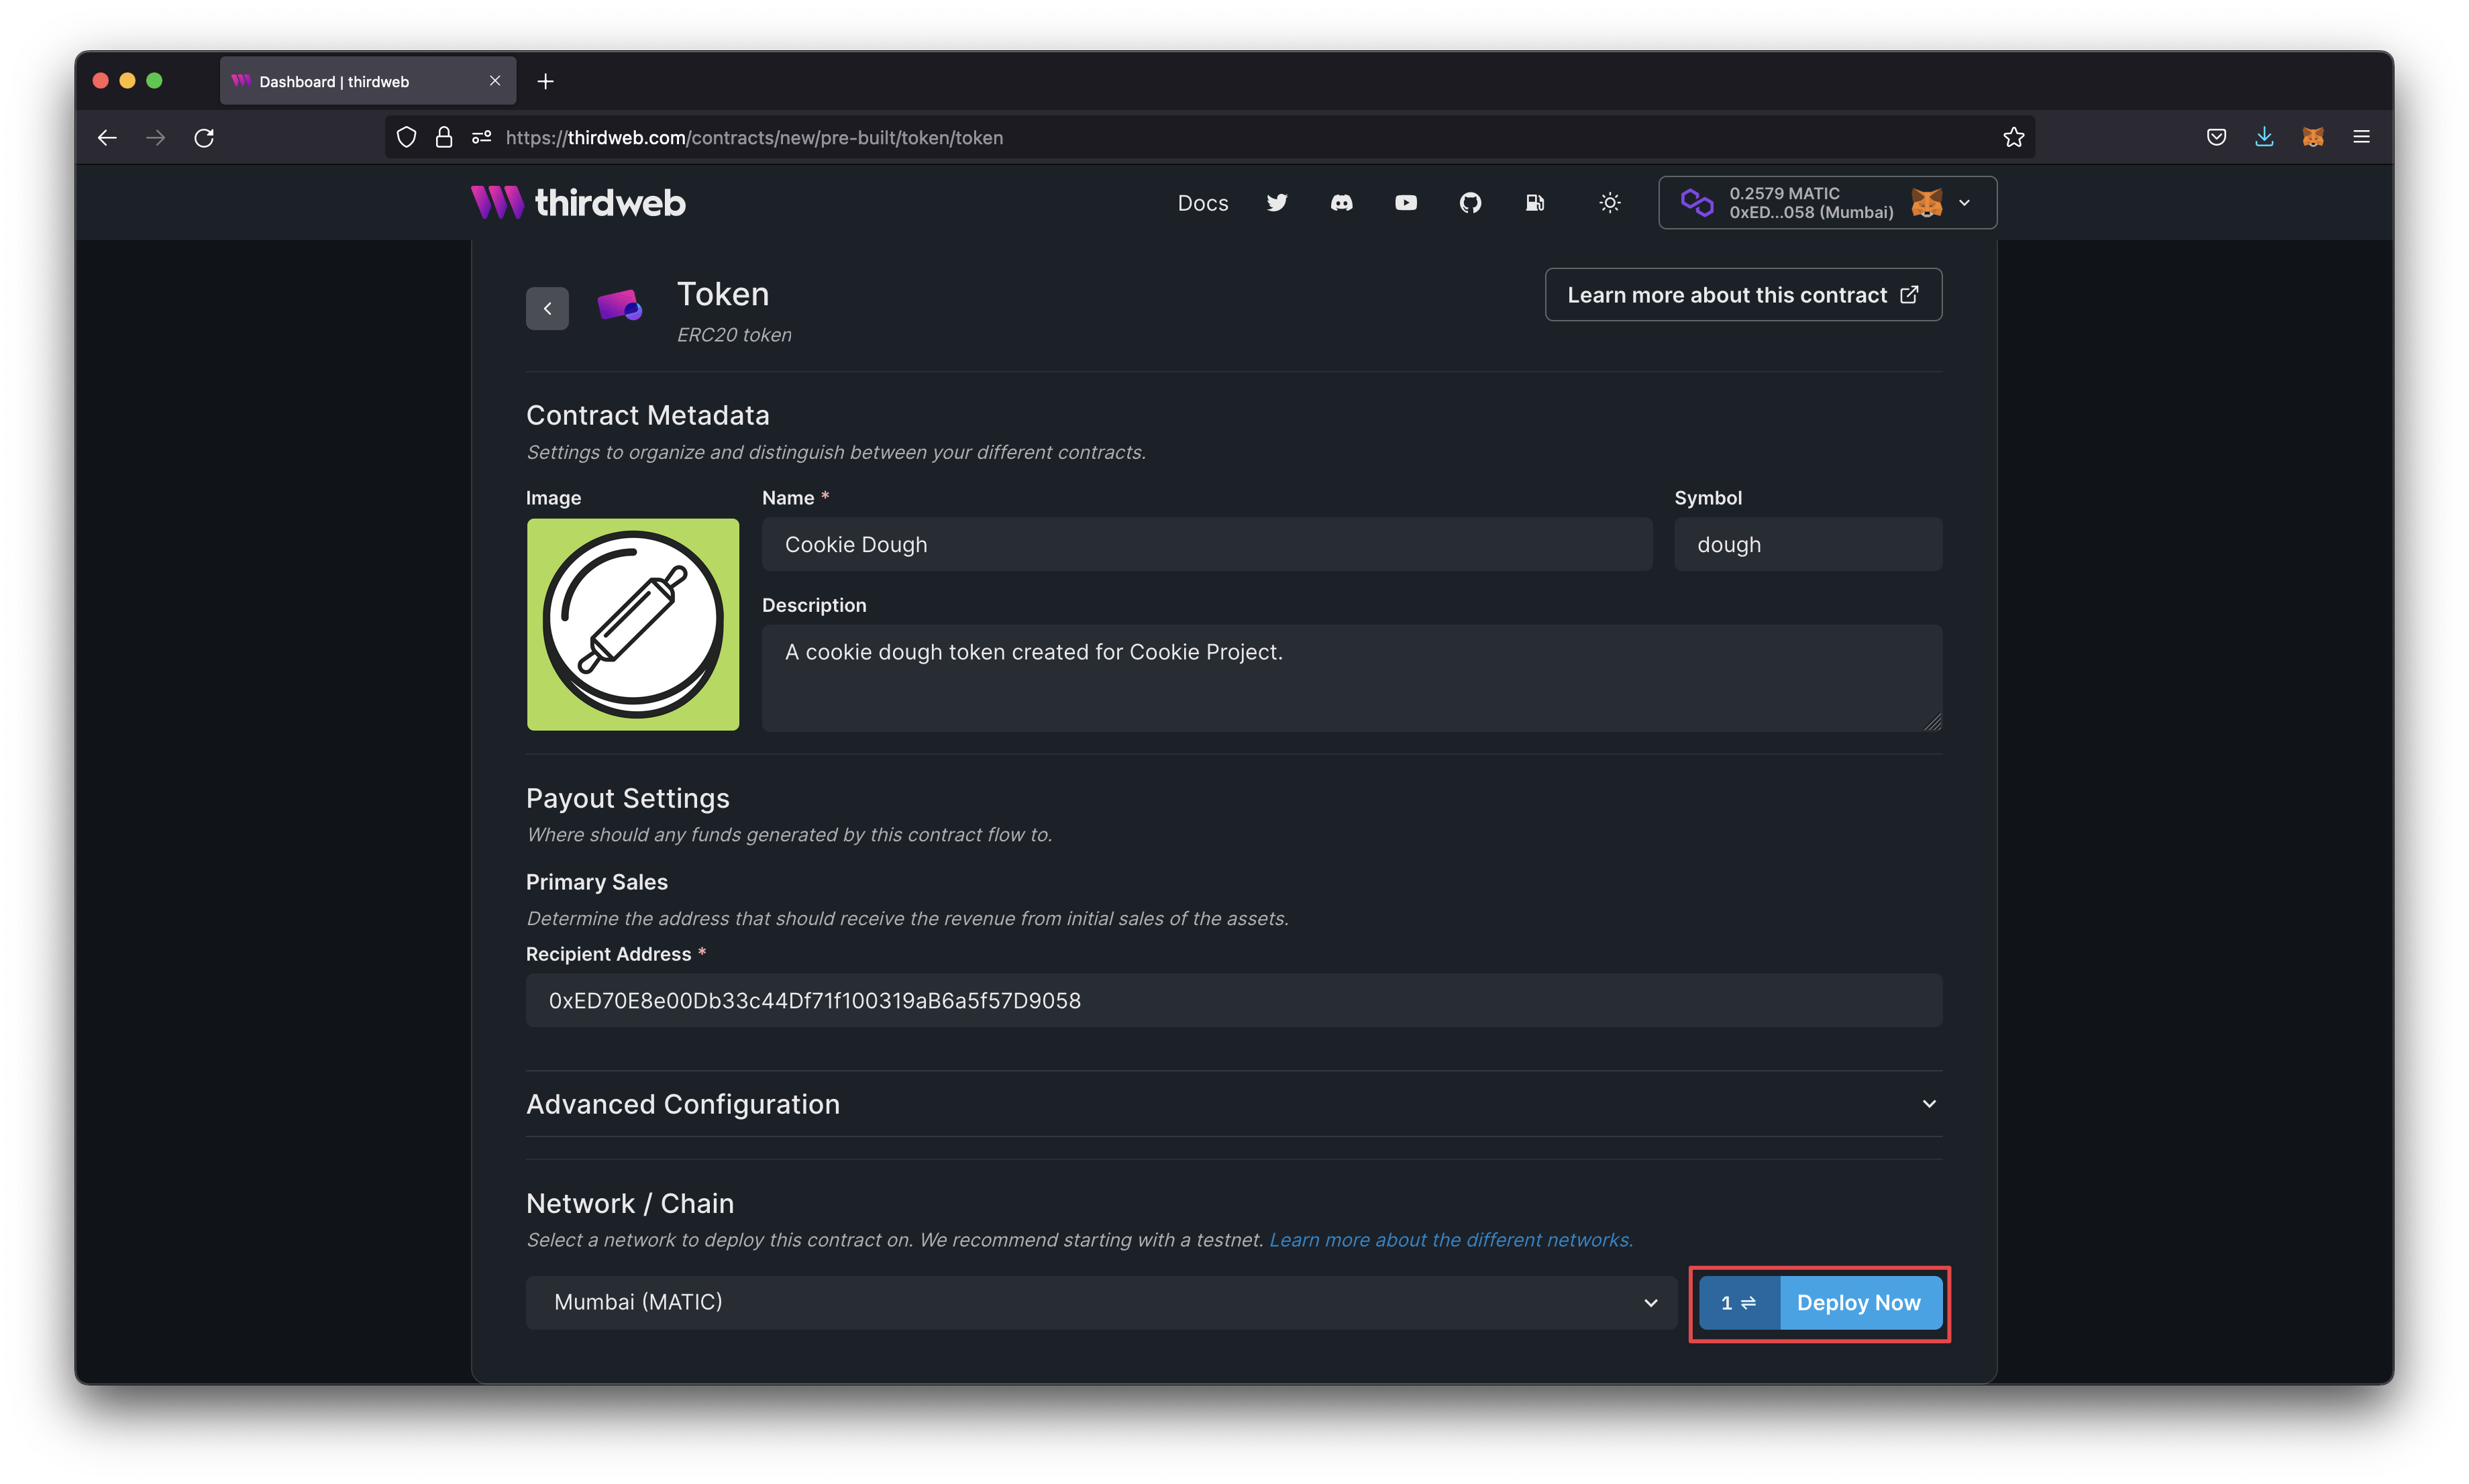
Confirmation will redirect you to the contract's dashboard. You can either explore the different tabs on your own or continue to the next chapter, where we will review them together.
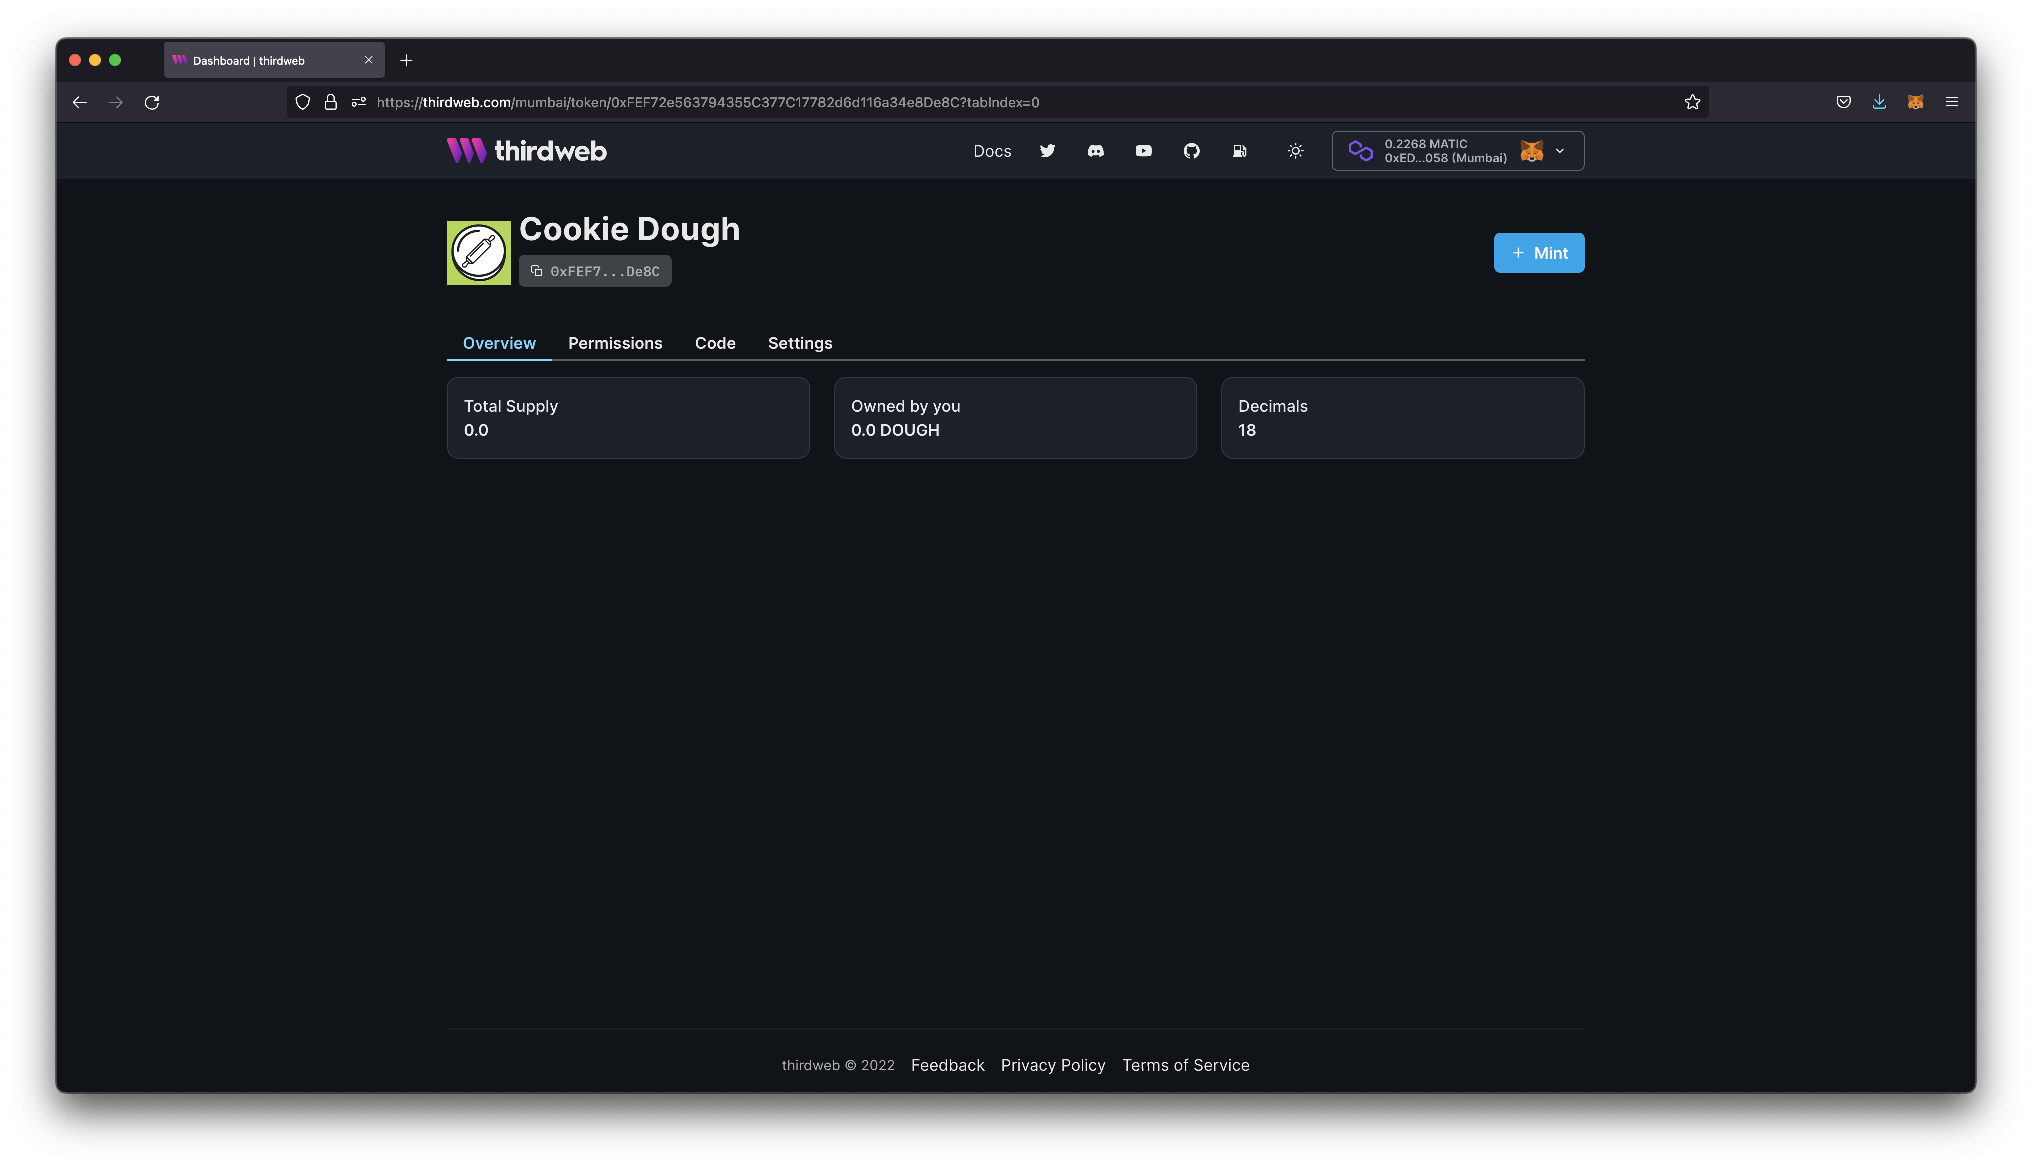
We have officially learned to deploy an ERC-20 contract to the blockchain via script and without writing any code. In the next chapter, we will learn how to interact with and call different functions on our contract.