
Ch. 2: Understanding the Wallet Interface

Introduction
Now that we have a wallet, we should probably understand how to use it. Our wallets are tools we can use to deploy smart contracts, buy and sell digital assets, access our digital assets, sign into different applications, and so on. Therefore, knowing how to make the most of it will be an integral part of your developer tool belt.
After learning about the wallet interface, in the next section we will deploy our first smart contract. To do so, we will learn how to get test currencies and export our private keys.
Understanding the Wallet Interface
Whenever we want to take action with our wallet, we will open up the extension bar on the browser. Another way to interact is through prompts. These appear in your browser when we interact with a part of a decentralized application that needs signing or transacting.
There are a variety of actions we can take with our wallet, including switching networks, signing transactions, connecting/interacting with decentralized applications, and more.
Networks
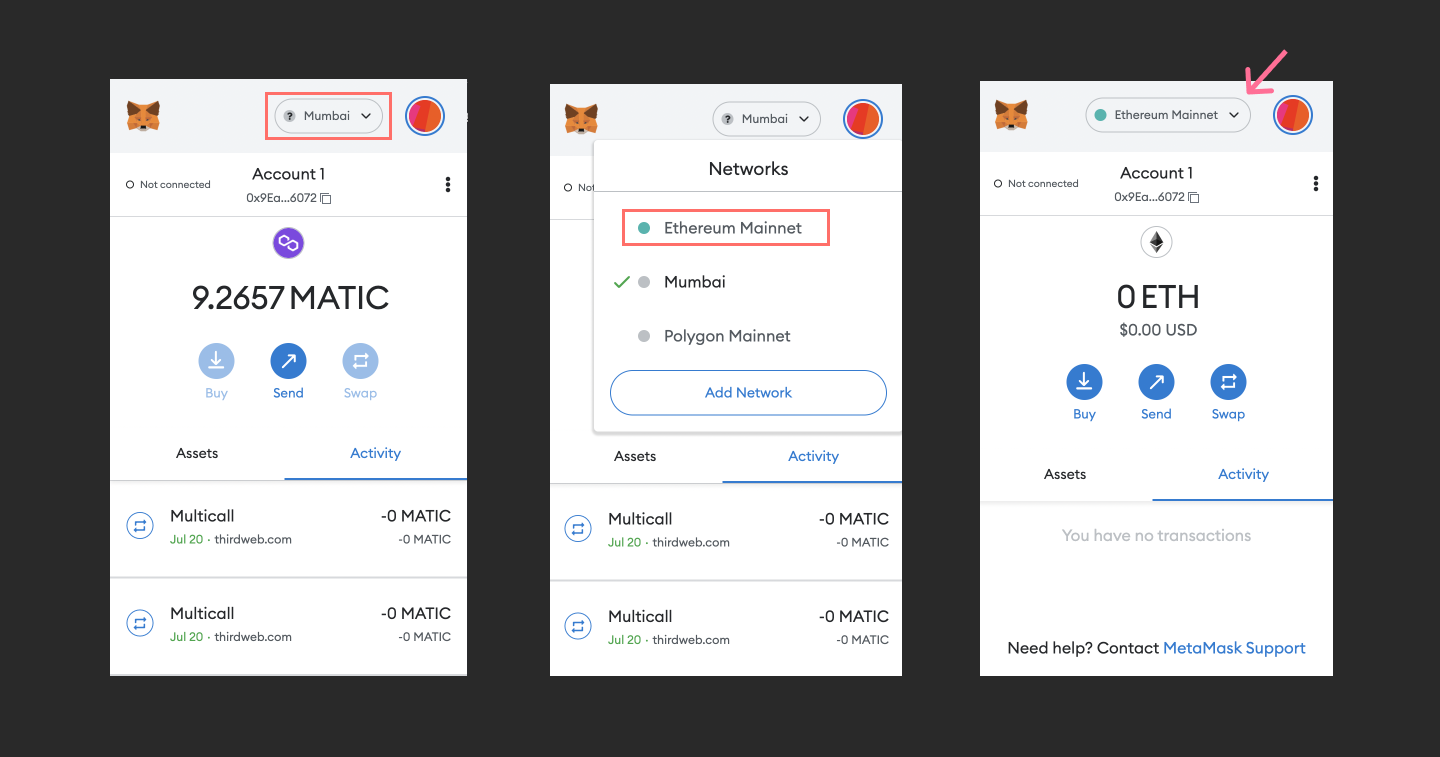
With one wallet, you can interact with many networks, including both main and test nets (covered later in this chapter). On MetaMask, we can use the drop-down at the top of our wallet extension to switch between networks.
If you want to add more networks, you can enter the required fields manually or try out a convenient website called Chainlist which lists all of the different chains and allows you to populate your wallet with them quickly. If you'd like an in-depth tutorial, check out the optional reading after this chapter.
Transactions
With our wallets, we can buy and sell native cryptocurrencies or digital assets such as tokens or NFTs. Often we need a fiat on-ramp to buy currency and have it in our wallet initially. We won't worry about this right now because we will be using fake currencies to build our applications. Later on, when we deploy our apps to production we will go over how to purchase real cryptocurrency.
Connected Sites
Whenever we connect to a site using our wallet, the connection is stored. We can see a list of all the different sites our wallet is linked to and disconnect from them when we need to.
I find this helpful while developing and I want to test what my user interface renders when my wallet is connected or disconnected.
Note: you can create a way to disconnect your wallet from the user interface, but this does not entirely sever the wallet from the site.
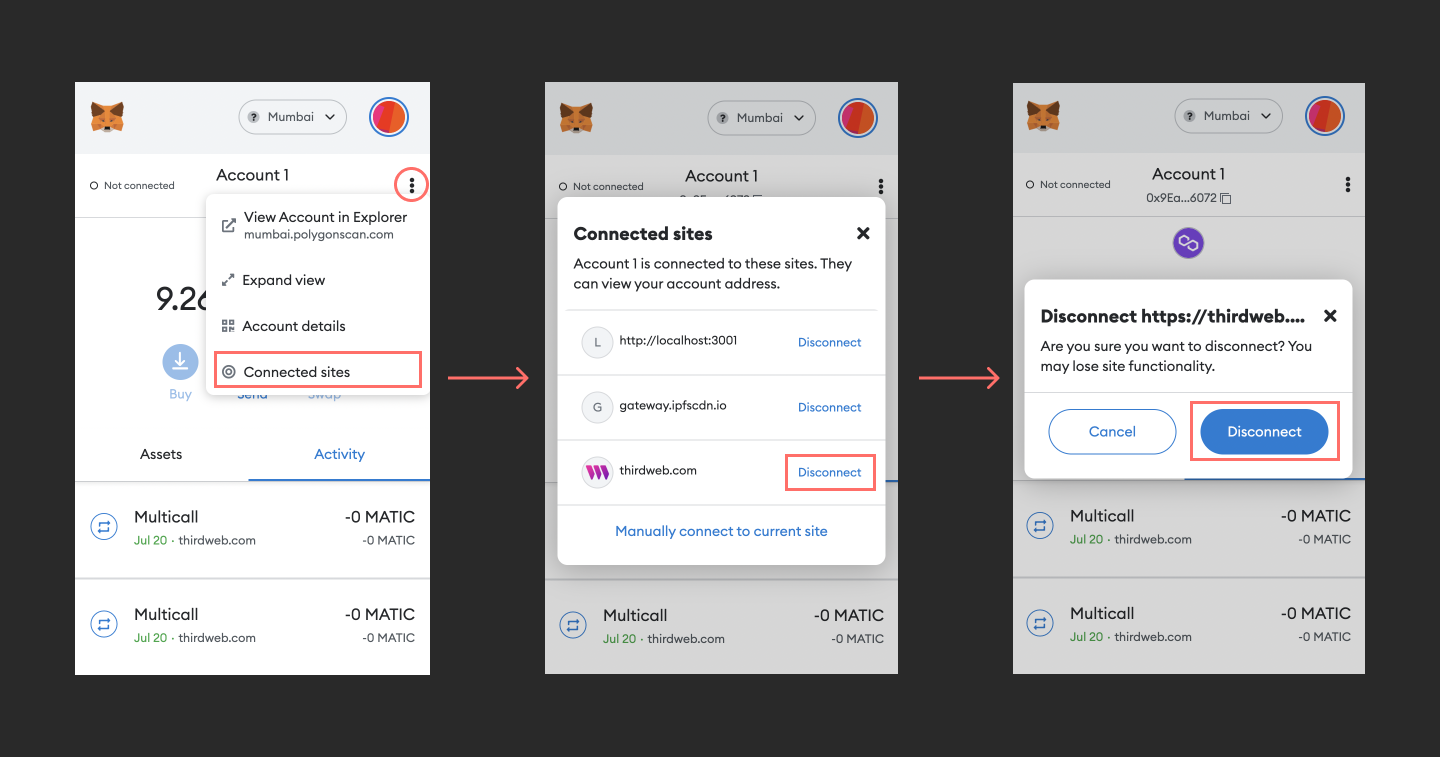
Additionally, as good practice, I frequently disconnect from sites after I am no longer using them.
Main Net vs. Test Net
When you deploy any smart contract to the blockchain, it is permanently there. There is no revert or undo button in a scenario where you make a mistake in your smart contract. To make matters worse, you often deal with large transactions, so you want to ensure there are no exploits in the smart contract. In addition to being unable to make mistakes, it costs money to deploy, and people have historically lost large sums of of money through exploits.
As a good practice, we should use tools to test our smart contracts locally and in a test environment before we deploy them to an actual blockchain. Hardhat is one such tool that allows us to test and transact with a smart contract in a local emulated environment. Almost all significant chains have test nets, which is another way to test your contracts with real miners worldwide.
To use test nets, we need to get test currency that emulates real money. To obtain these faux currencies, we have to request funds from what is known as a faucet.
List of test nets supported by thirdweb & their faucets:
| Testnet | Faucet |
| Rinkeby (RIN) | https://faucet.paradigm.xyz/ |
| Goerli (GOR) | https://faucet.paradigm.xyz/ |
| Mumbai (MATIC) | https://faucet.polygon.technology/ |
| Fantom Testnet (FTM) | https://faucet.fantom.network/ |
| Avalanche Fuji Testnet (AVAX) | https://faucet.avax.network/ |
| Optimism Testnet (KOR) | https://faucet.paradigm.xyz/ |
| Arbitrum Testnet (KOR) | https://faucet.paradigm.xyz/ |
Let's Get Test Currency
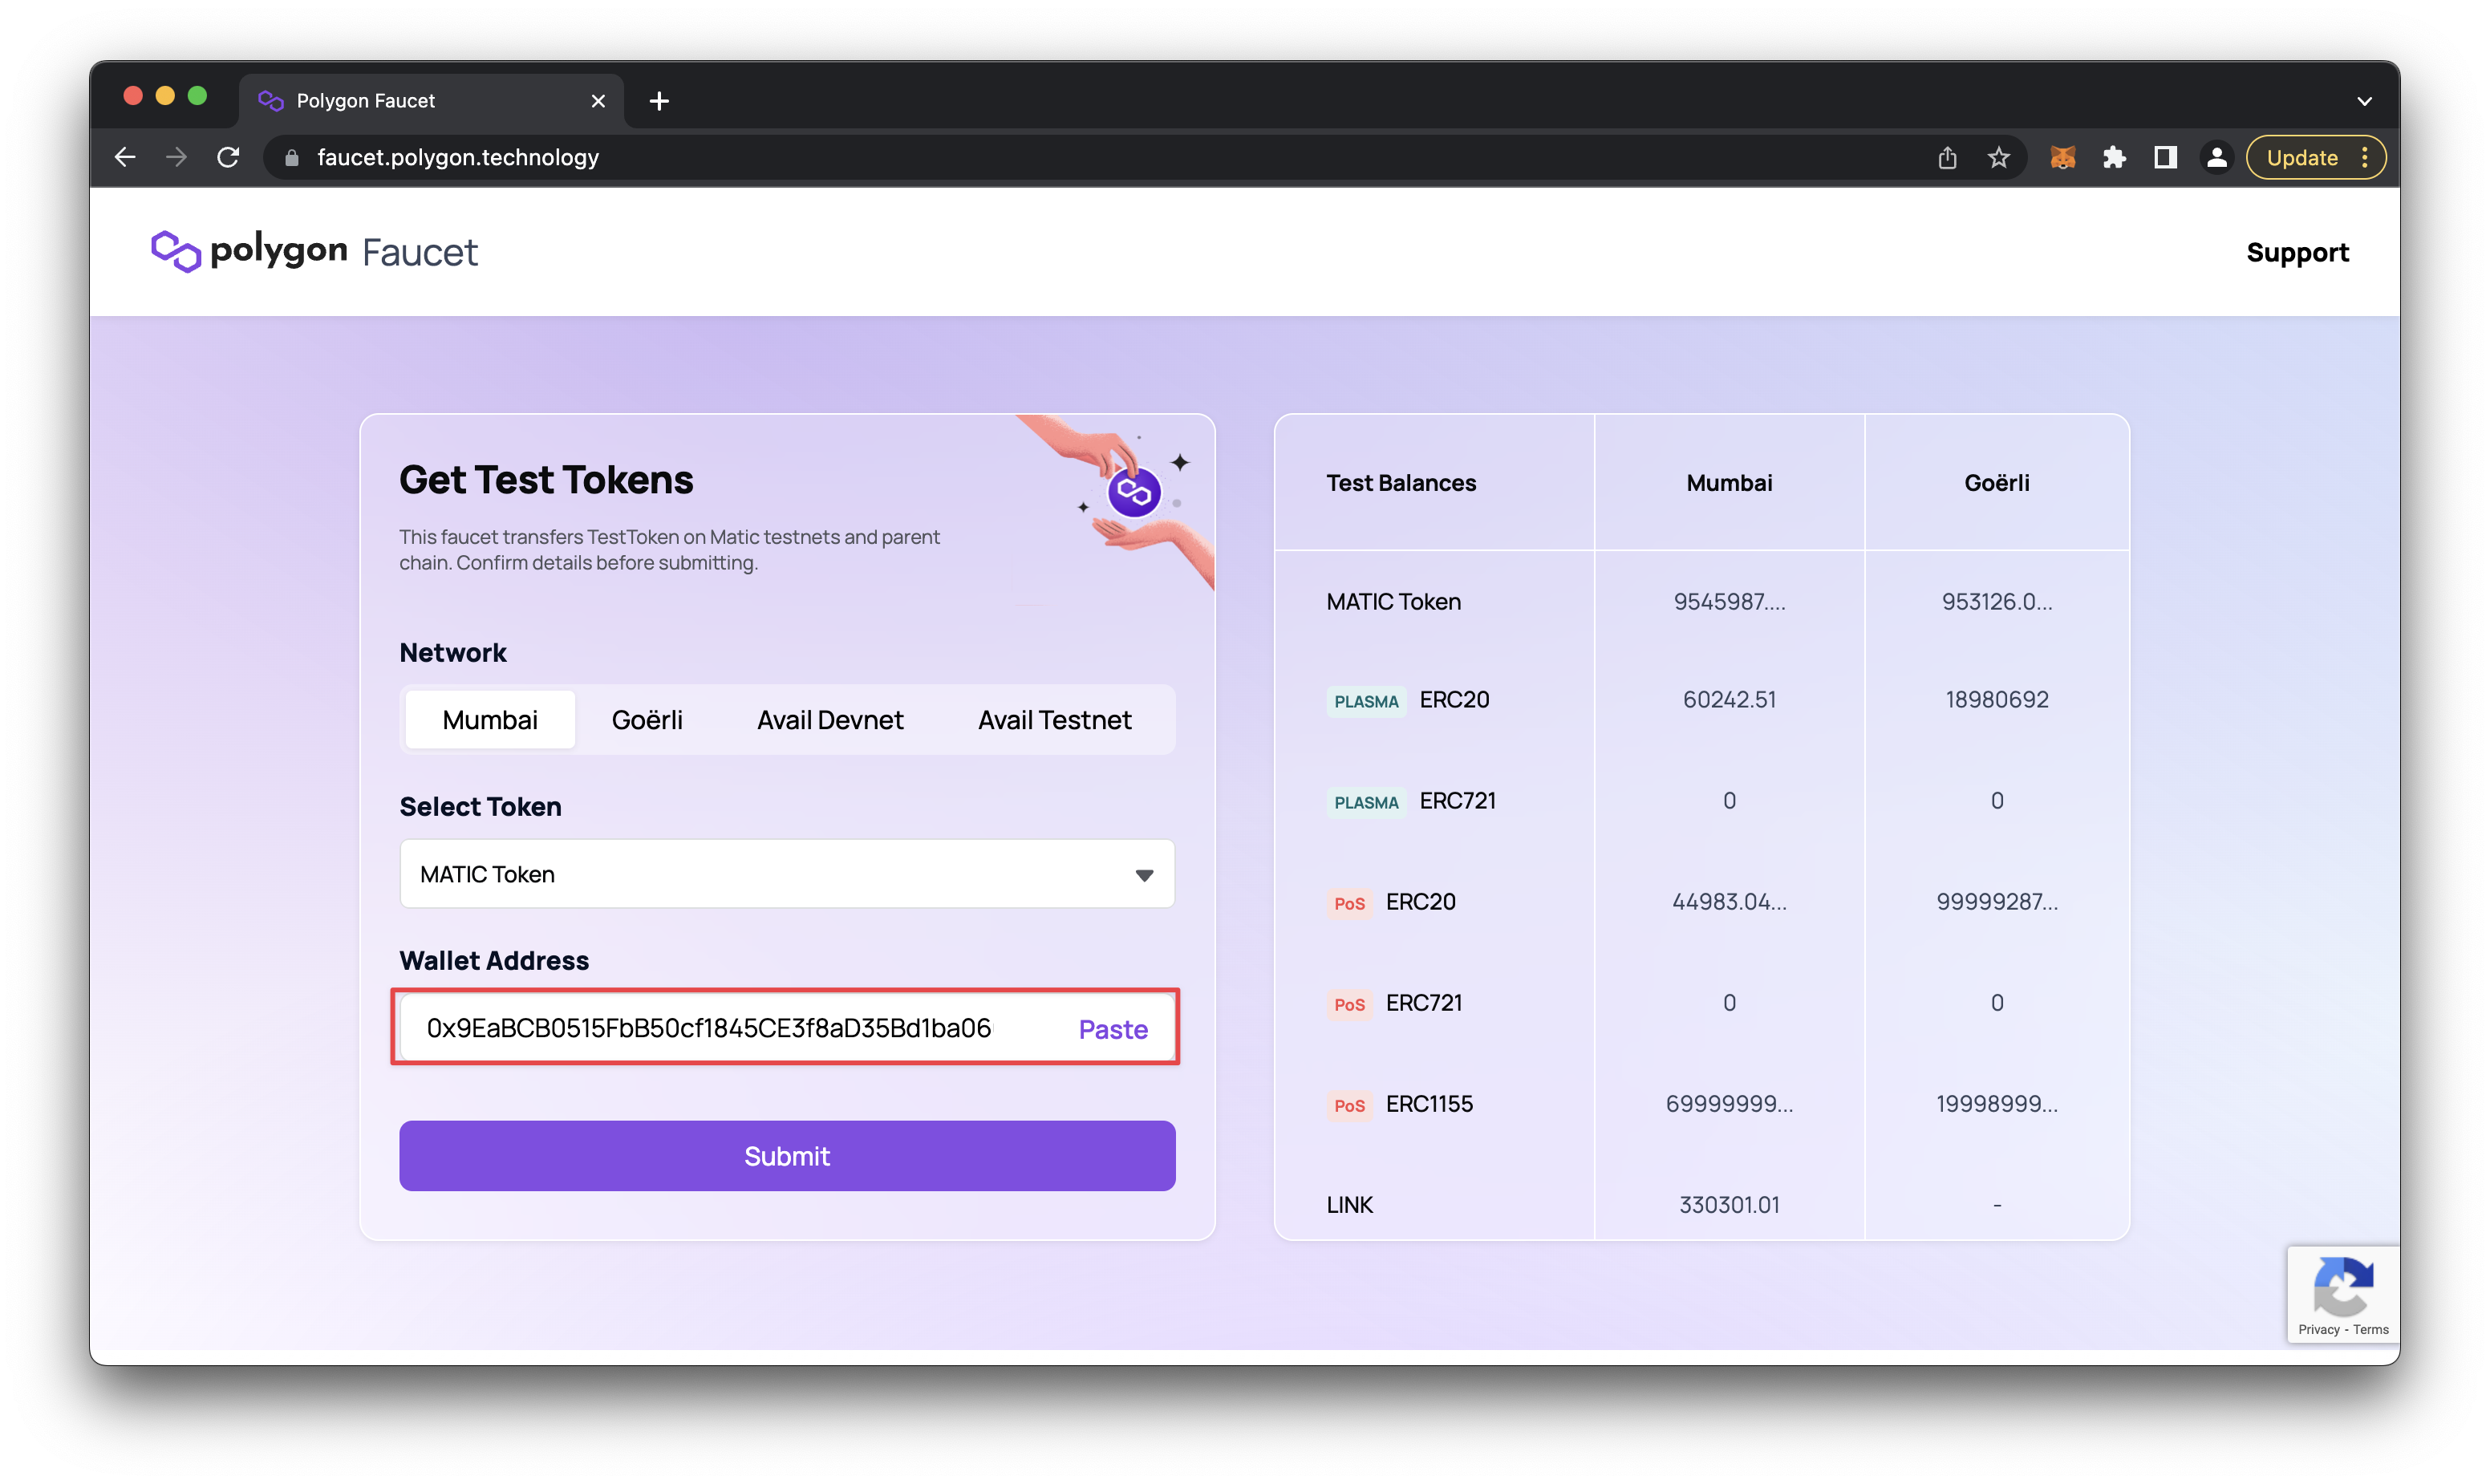
I want to deploy my main project later on Polygon, which is a popular, cheap, and eco-friendly chain. Therefore, I am going to test my projects on Polygon Mumbai, which is one of the Polygon test nets.
- Navigate to https://faucet.polygon.technology/
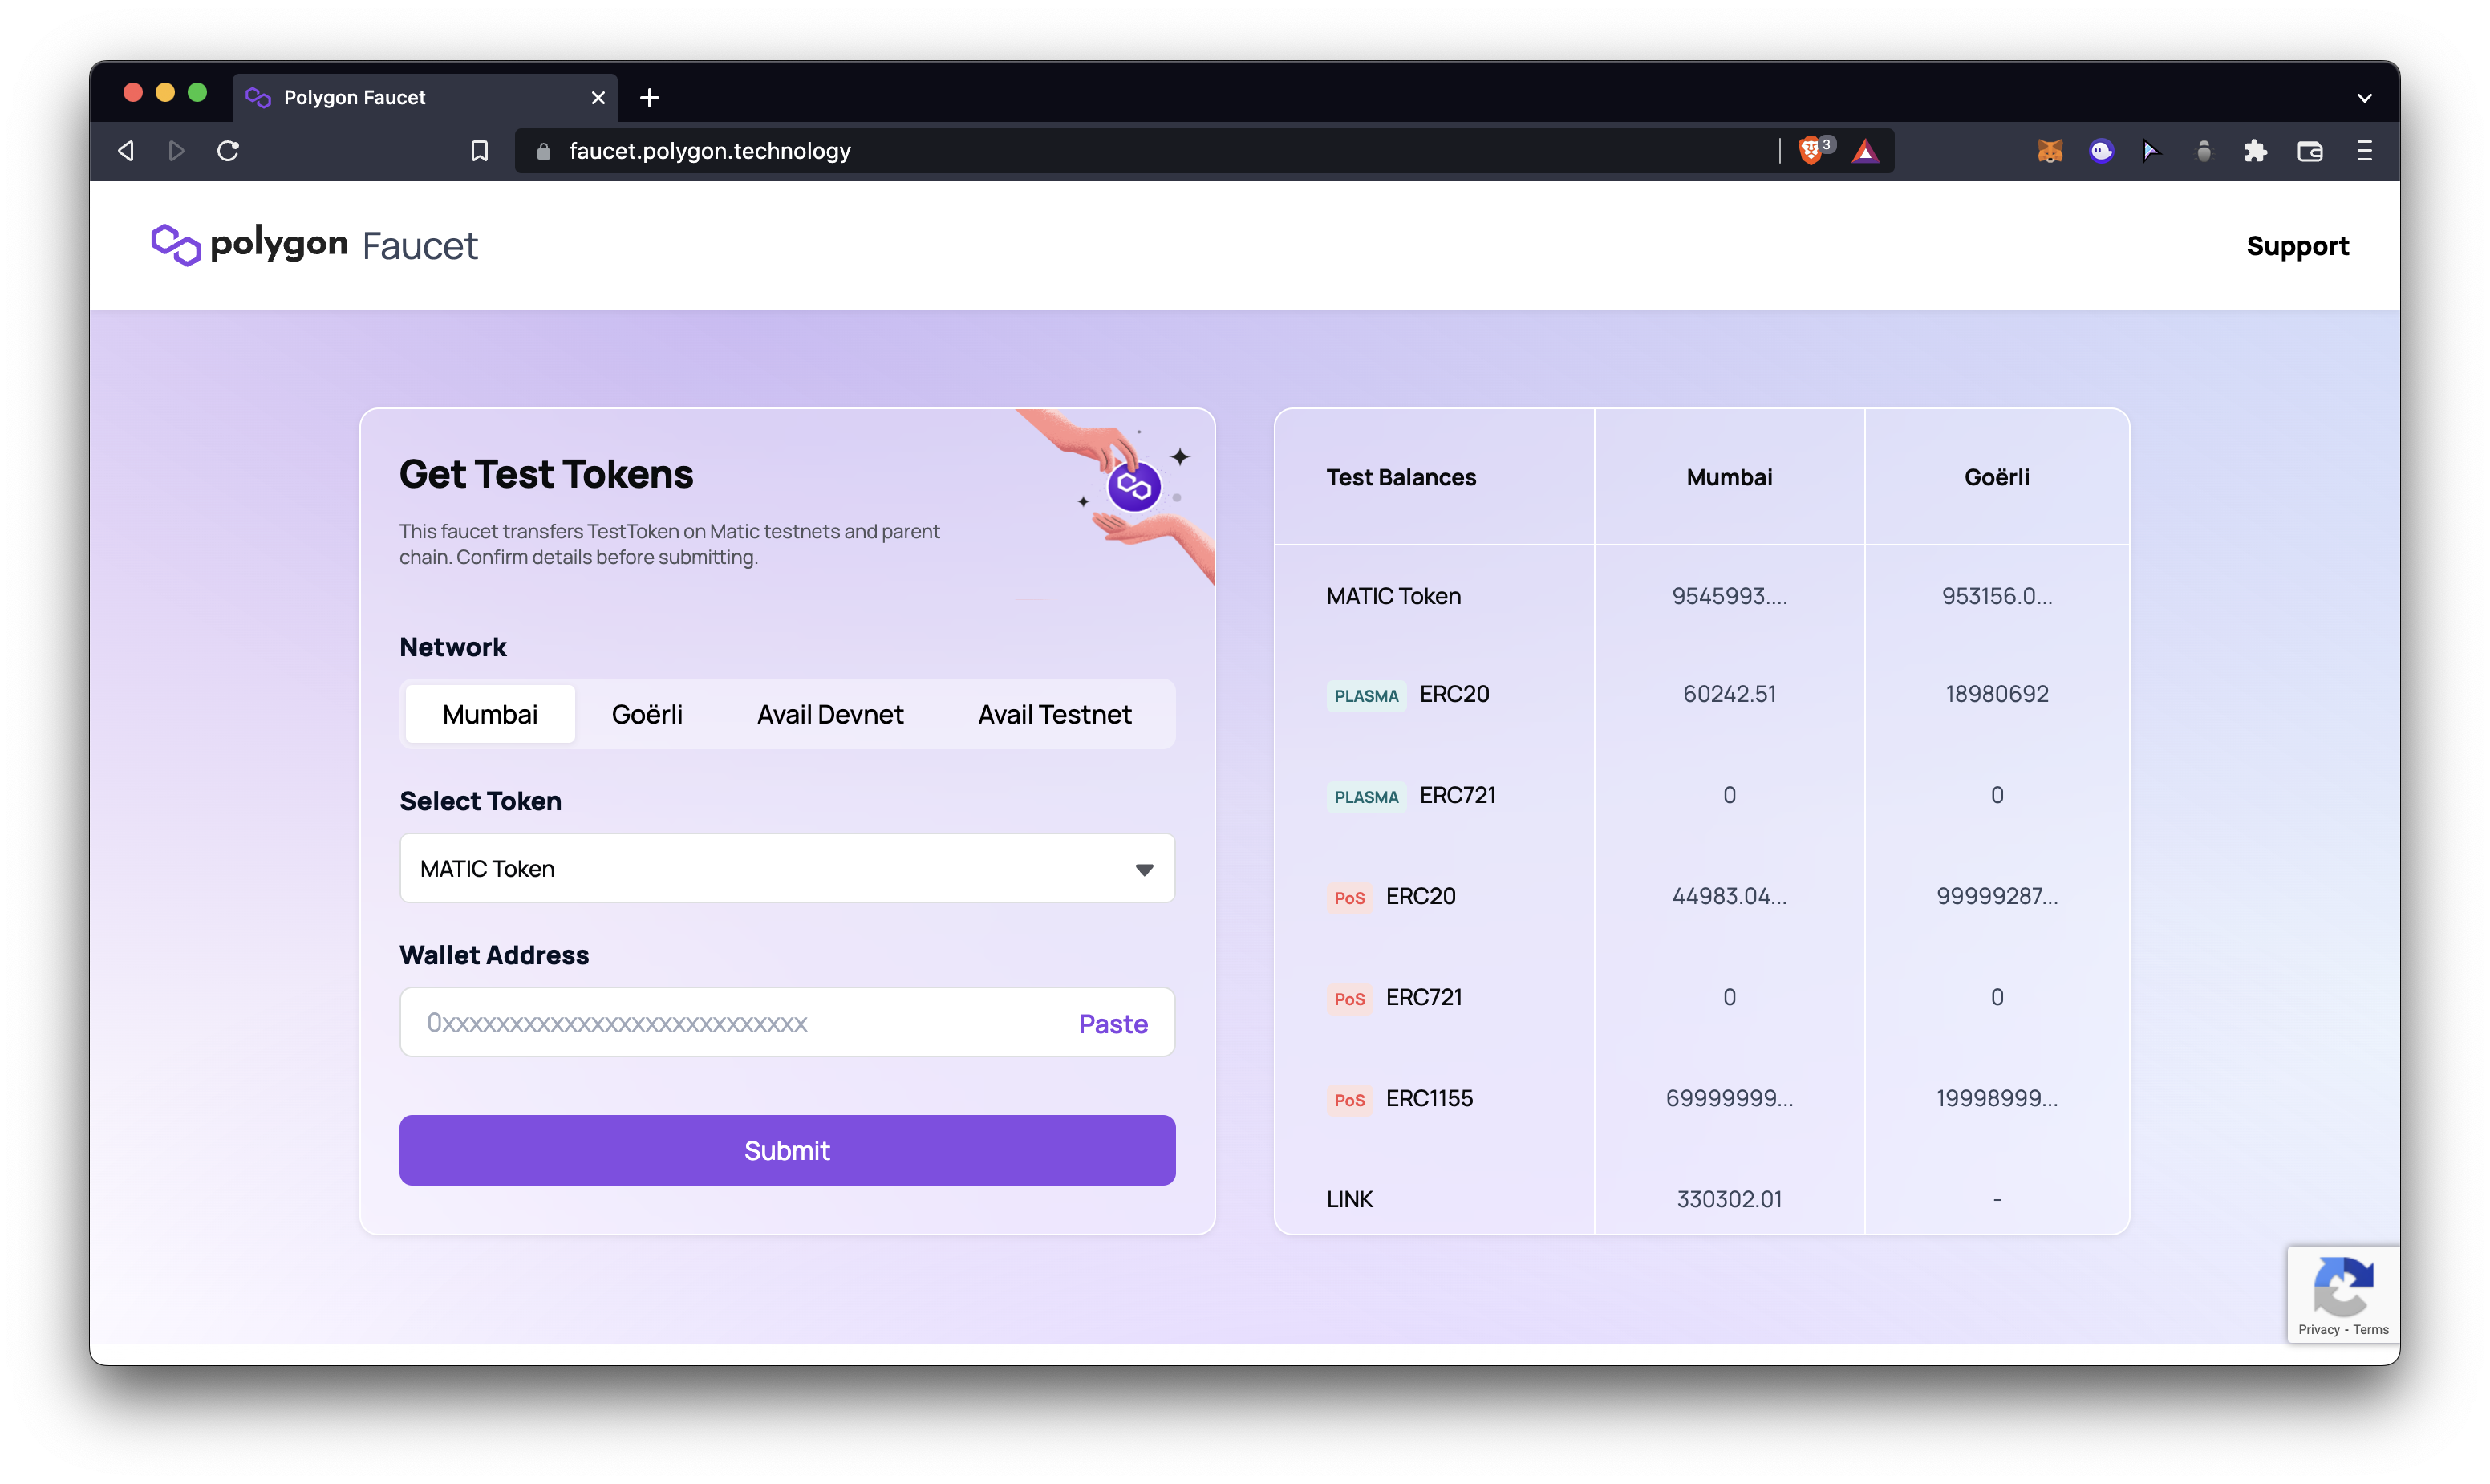
- Open your wallet and copy your wallet address to your clipboard.
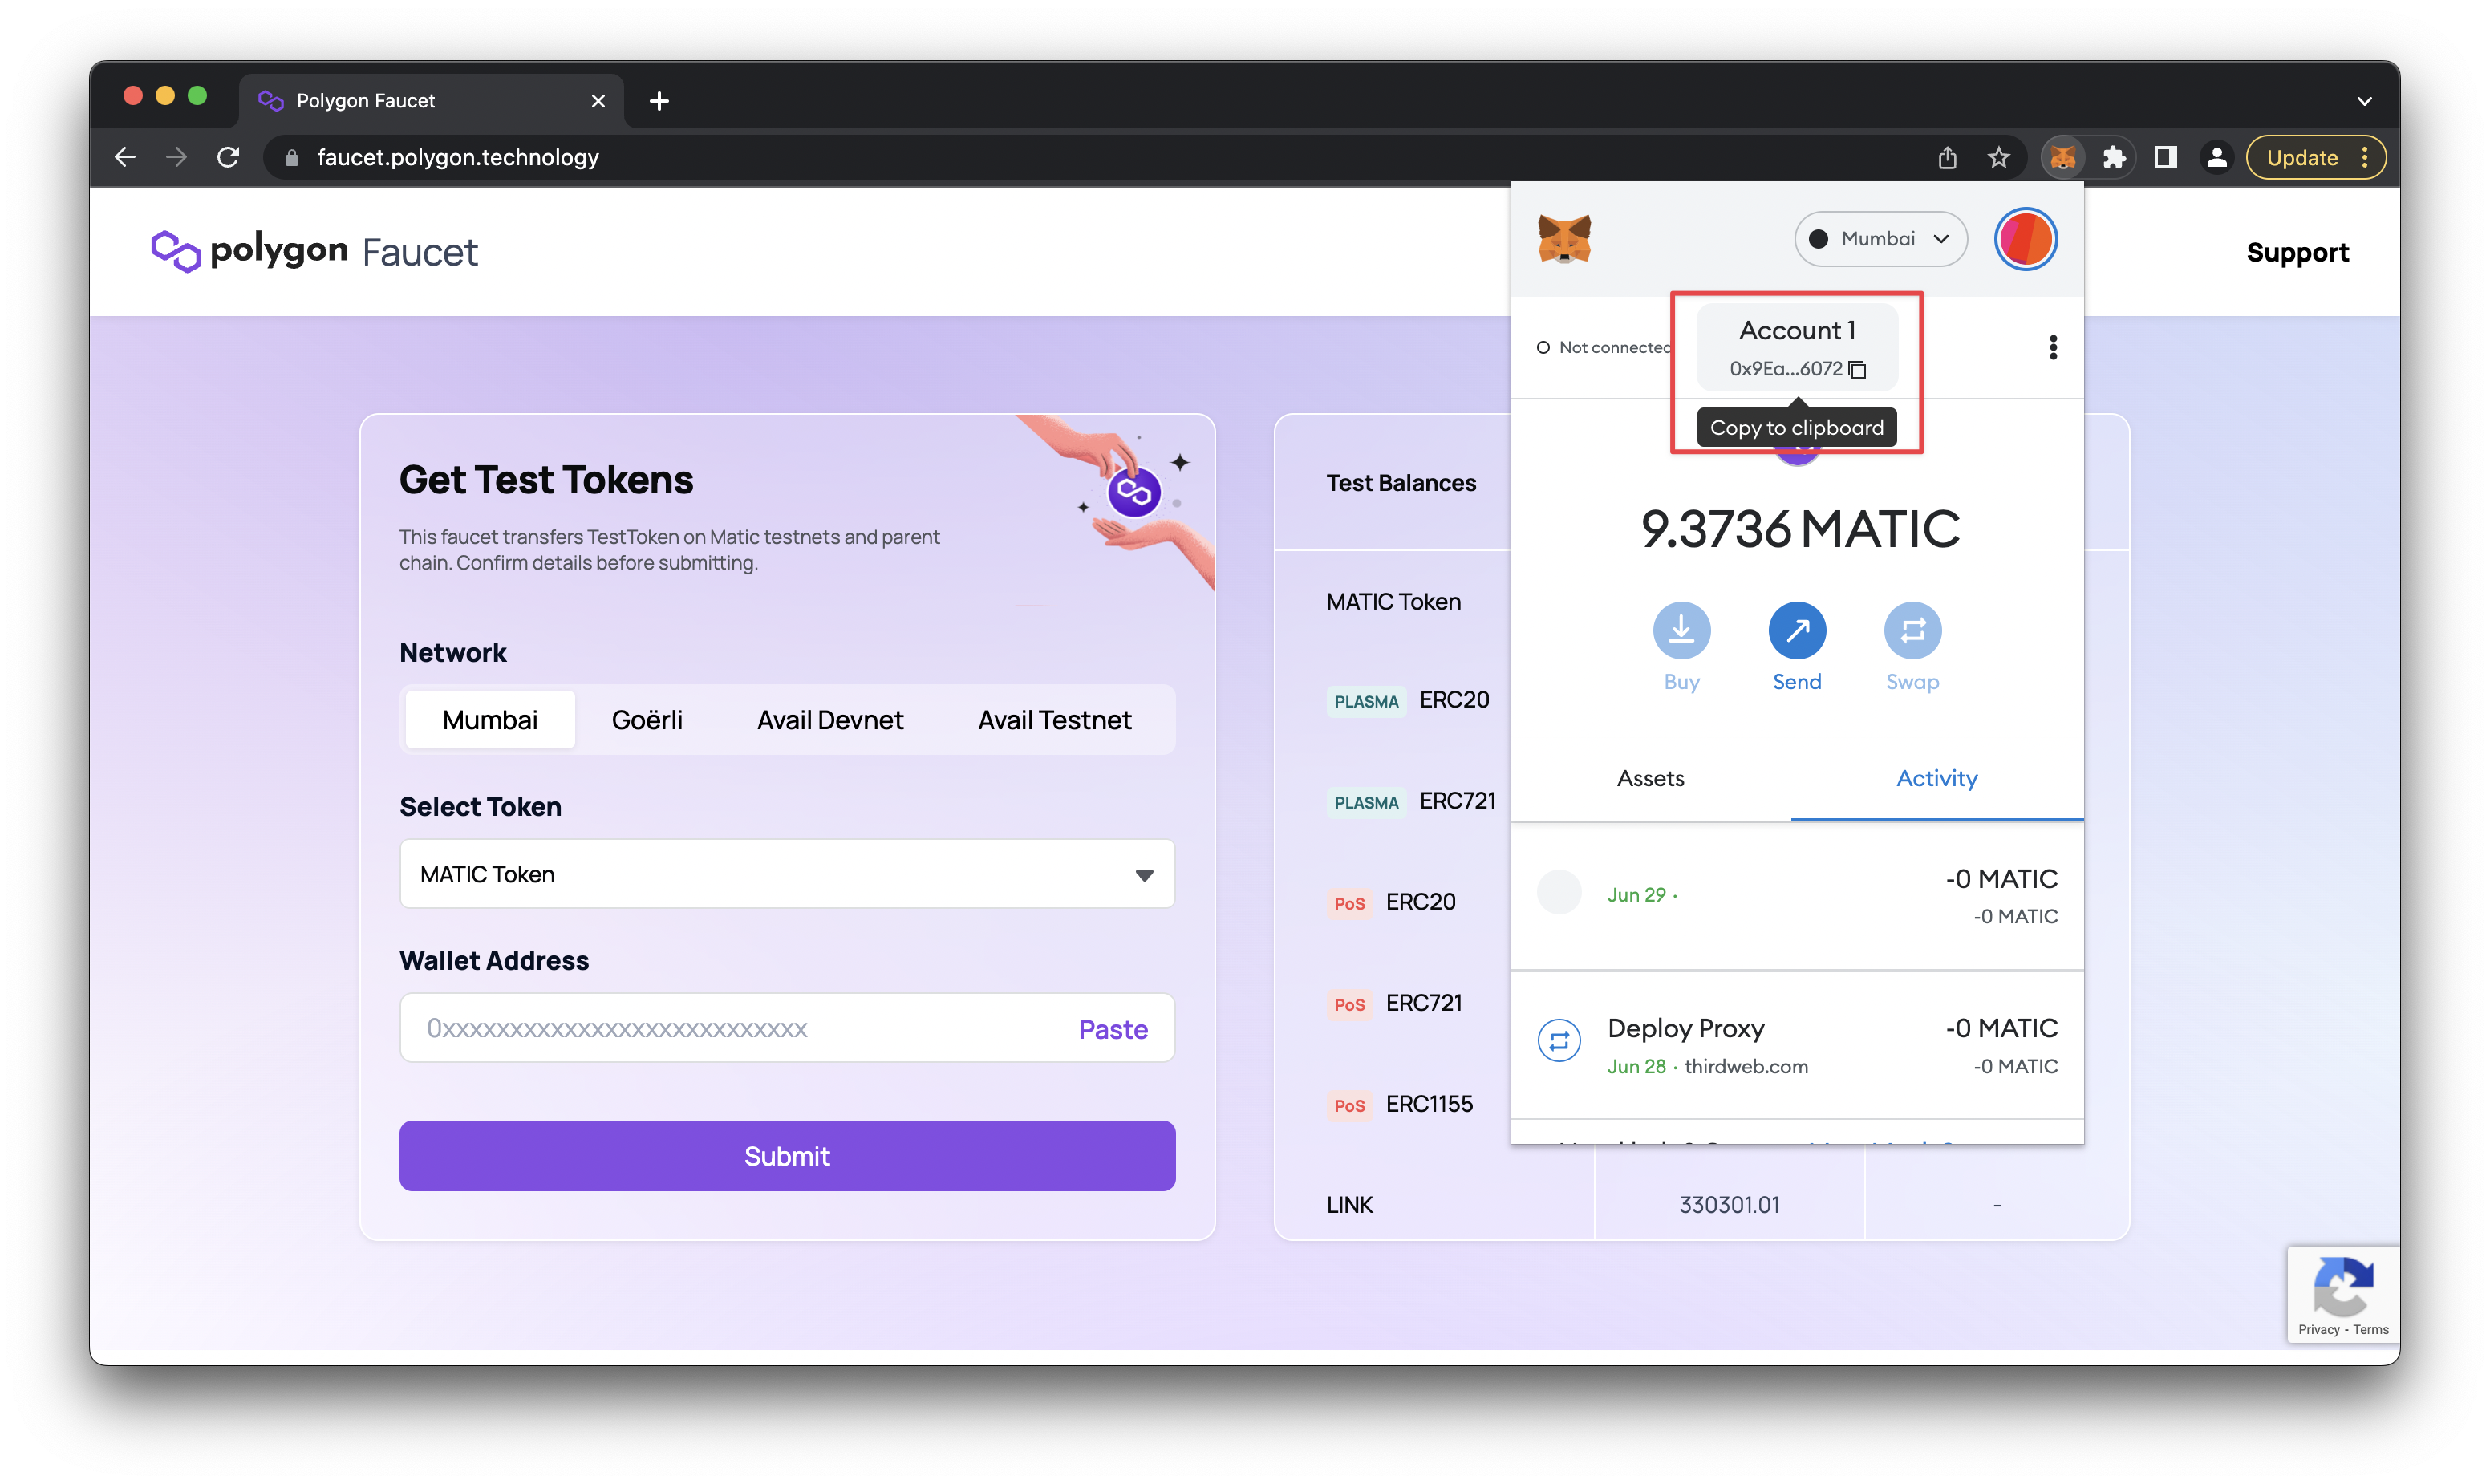
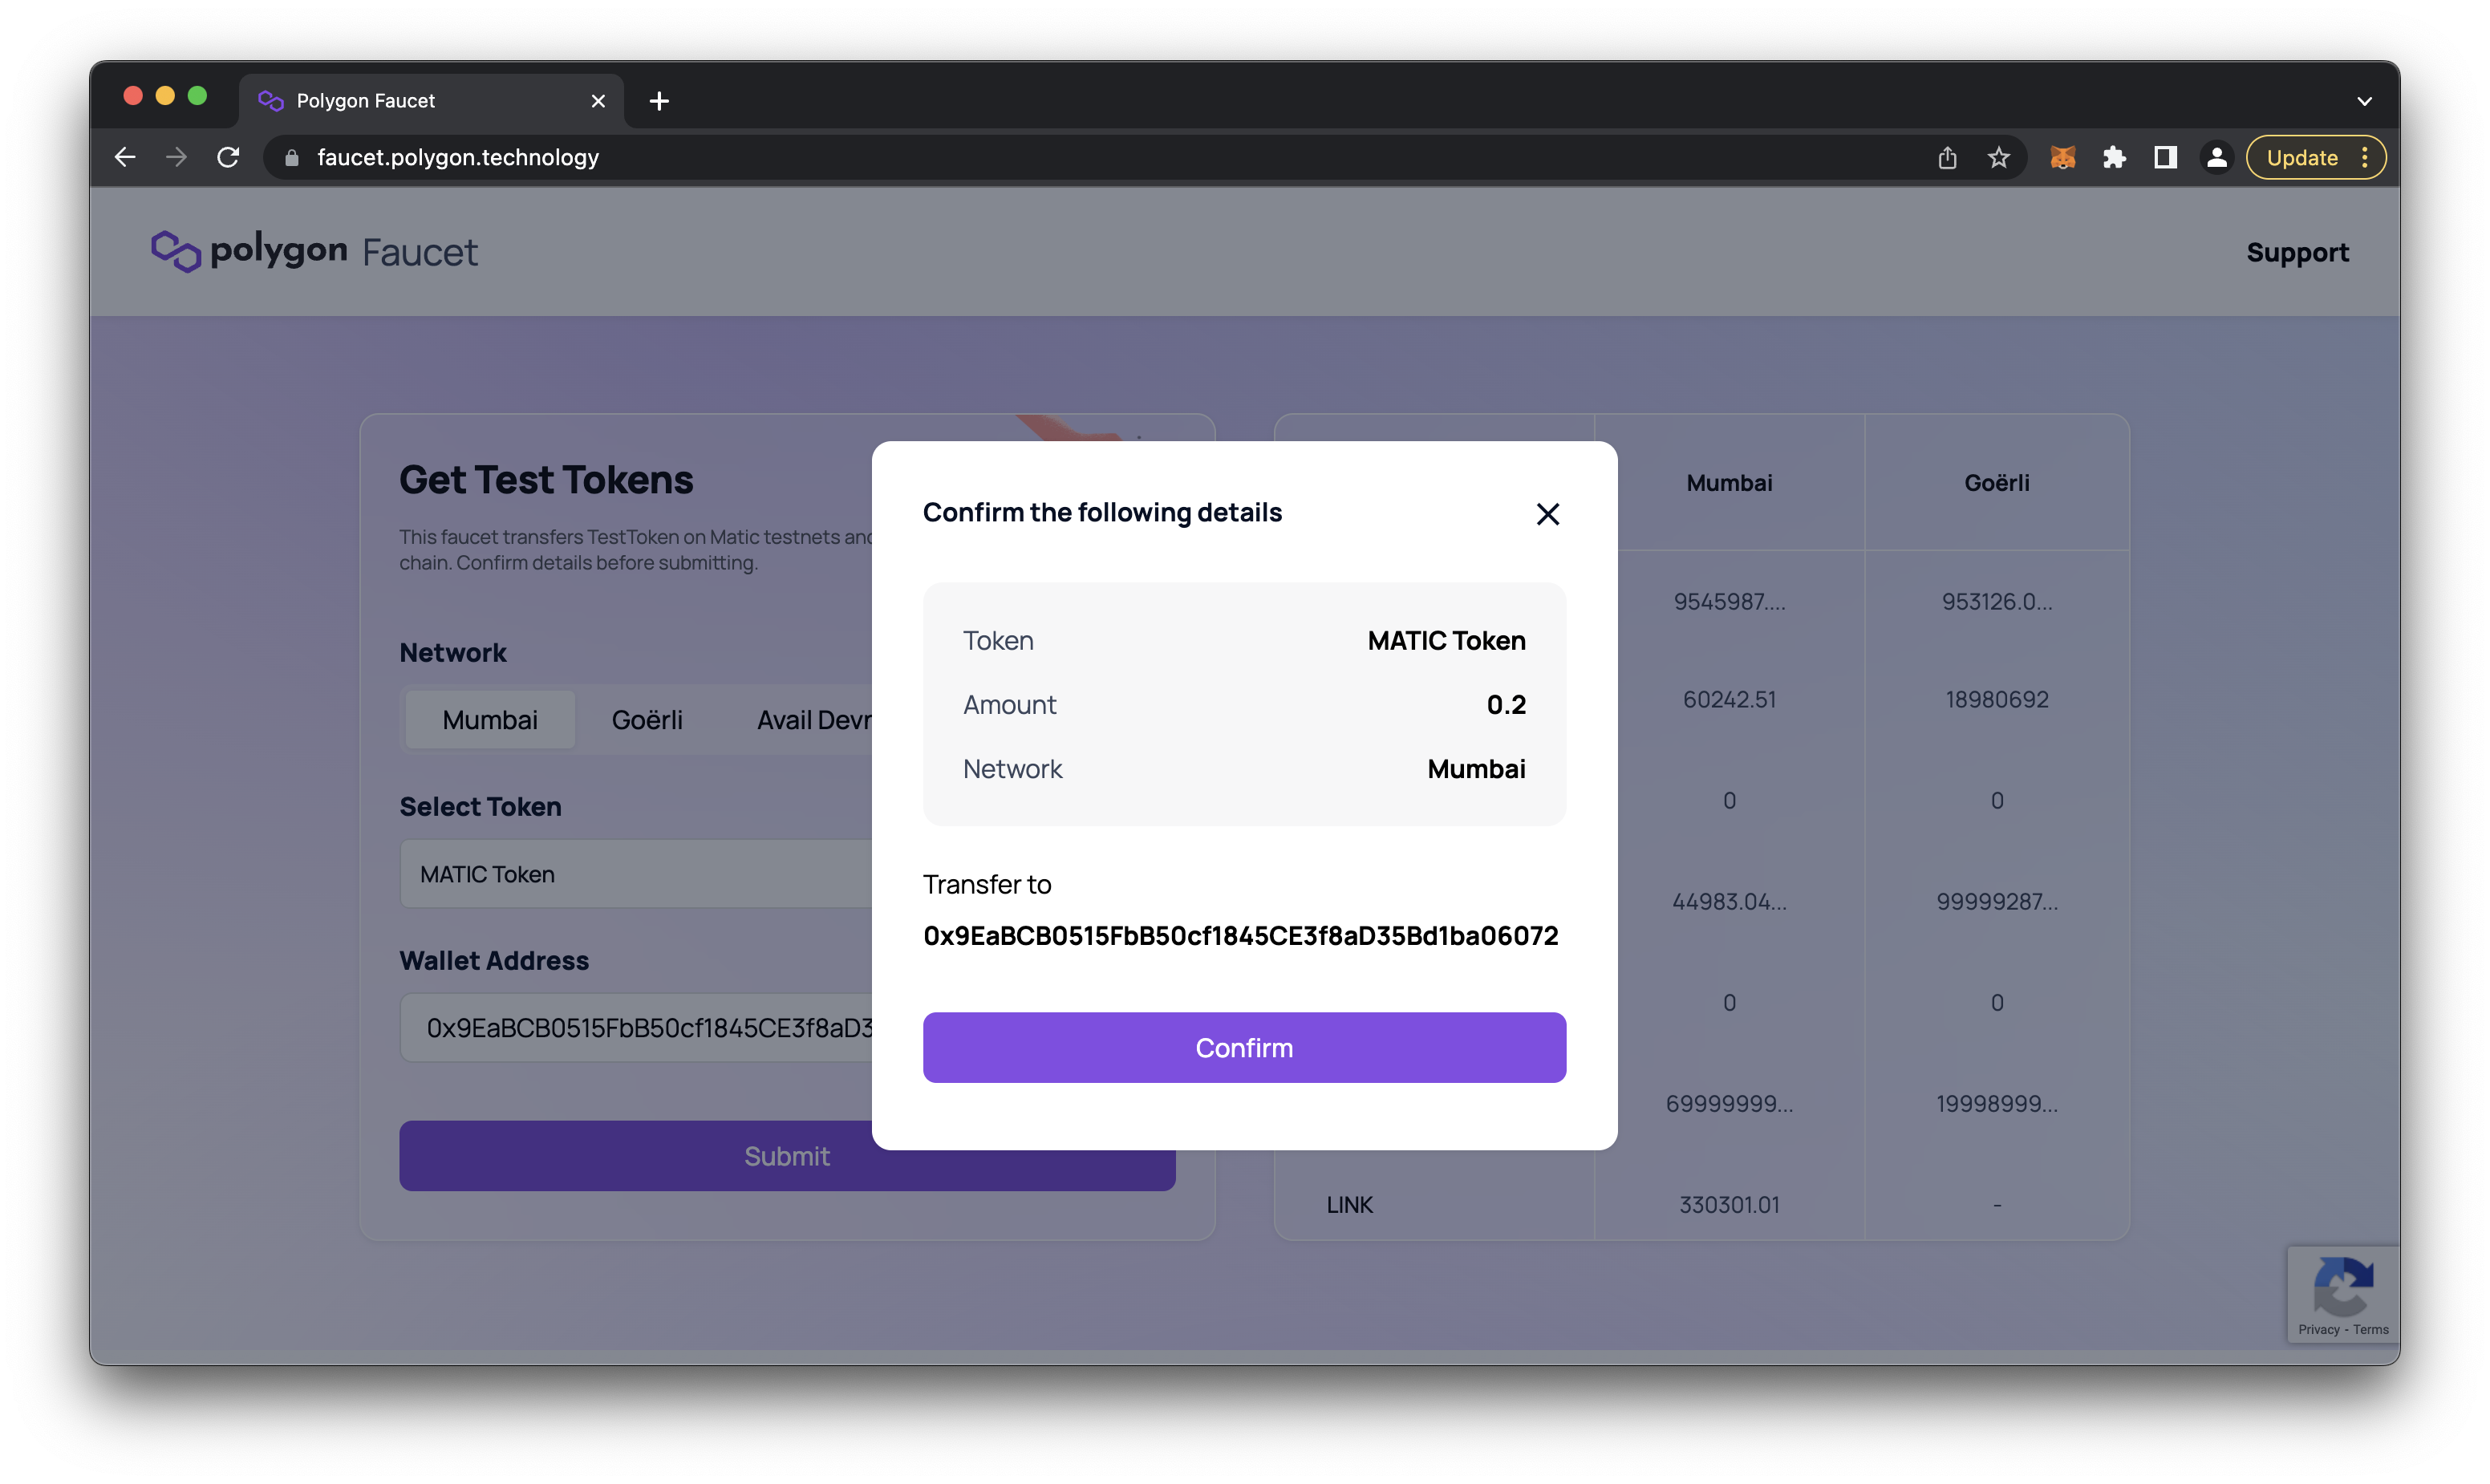
- Paste the public address to the submission field on the faucet and click submit.
- Confirm and wait about a minute before the funds appear in your wallet.
Yay! Now you have some test currency we can use to build our app.
Export Private Key
Lastly, for the next chapter, we will need to use our private key to deploy an ERC-20 token to the blockchain. Therefore, we must learn to export our private key for our .env file.
Remember that we don't want to expose our private key to anyone or store it unsafely. Be cautious to keep it stored safely and not on any servers or accidentally pushed to GitHub. You must keep your private key safe at all times or you will risk losing your funds to malicious actors.
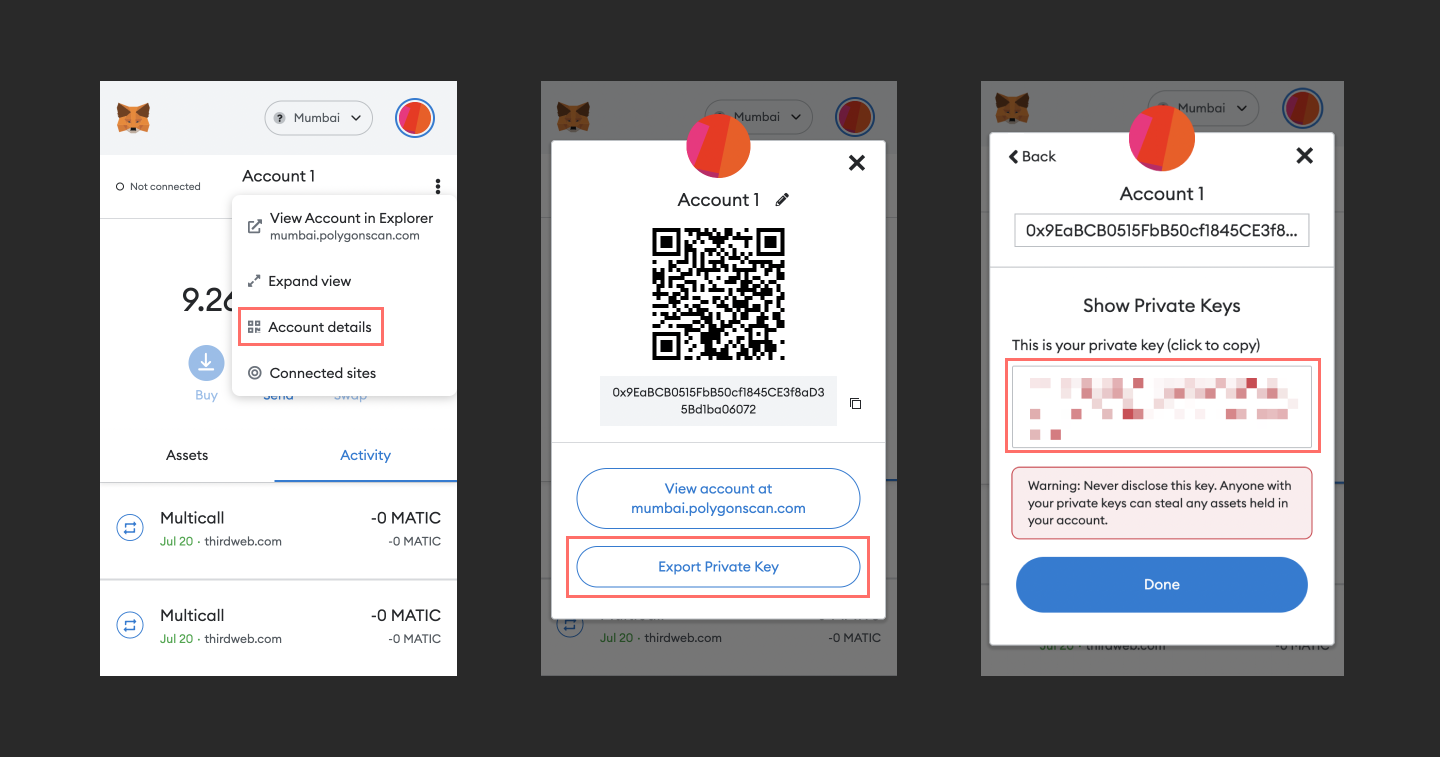
To export your private key on the MetaMask browser extension:
- Click on the three dots to bring up the drop-down options on the menu
- Navigate to 'Account Details' which will bring up your public address as a QR code and show some options.
- Click on 'Export Private Key' which will prompt you to provide your password for security reasons. Once confirmed, the next screen will display your private key ready to be copied.
Conclusion
Now that we have some test currency and exported our private key we are ready to start building. In the next chapter we will be deploying our first contract on the blockchain.


